share
03
Nov 2010
Nov 2010
We have been enjoying writing down the things we are thankful for on our Write On Frame – and surprisingly they are not all cured meats. ;)
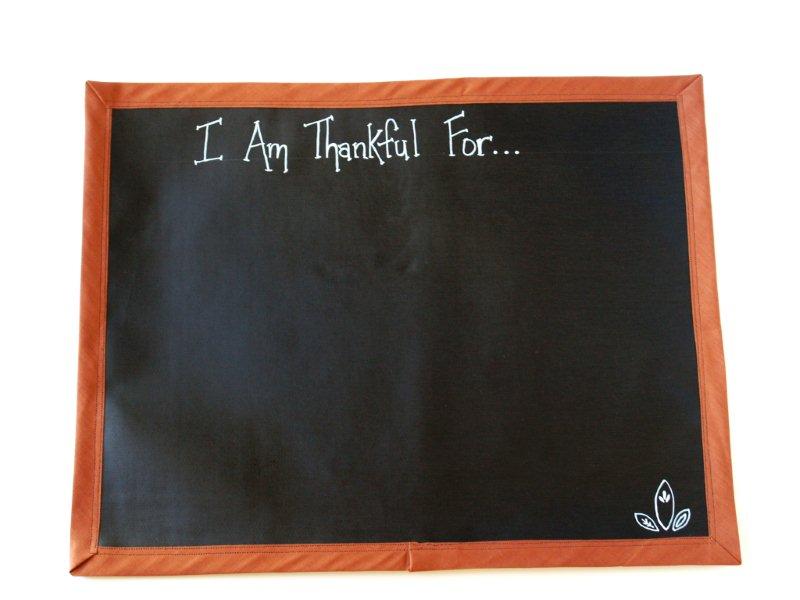
But it got me thinking about my little nieces – they are really too young for something like that. I thought these fun Chalk cloth placemats would be perfect for them. You’ve probably seen Chalk cloth Fabric Placemats around – this is similar but with a Thanksgiving twist!
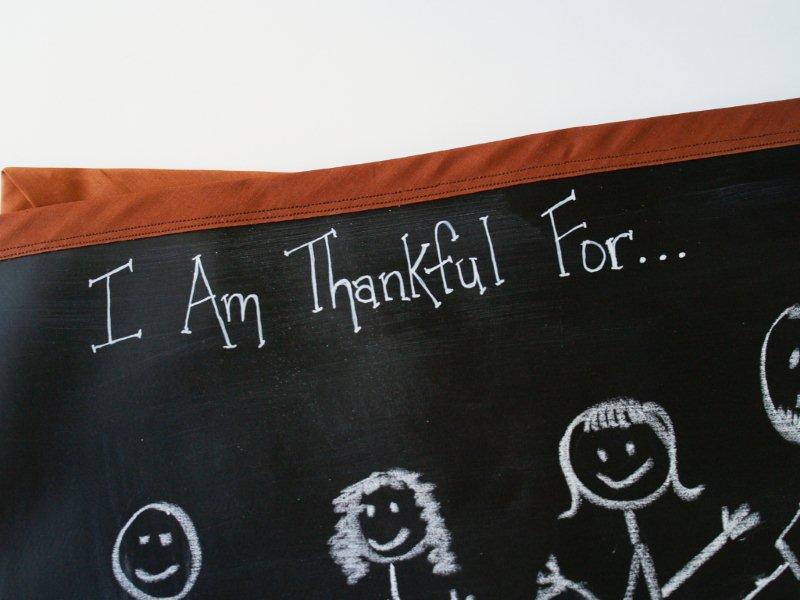
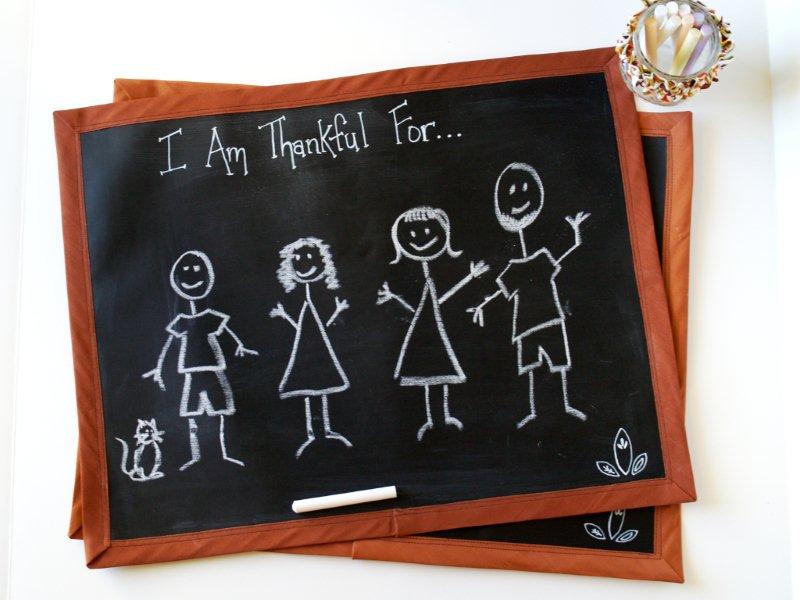
The placemat says, “I am thankful for” and they can draw out what they’re thankful for, and easily erase it and draw something new.
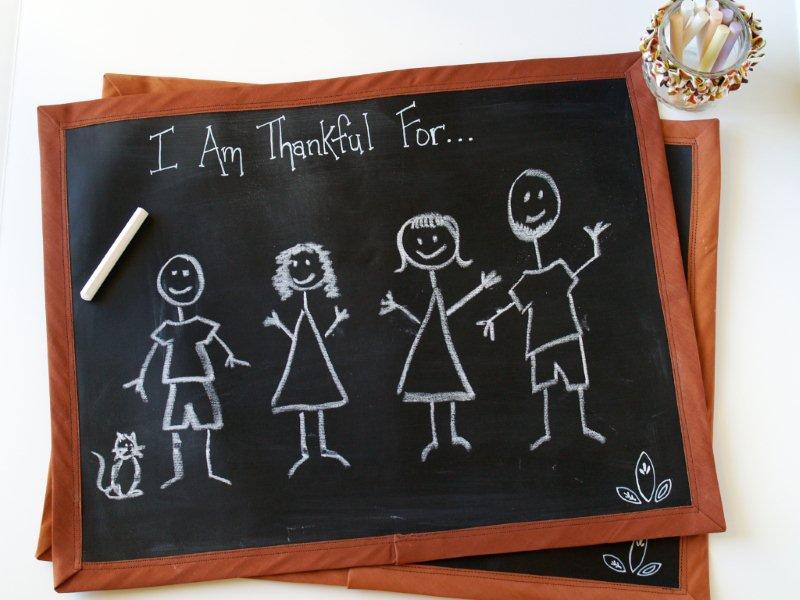
(No laughing at my stick figure family. I’m no Roo. :)
If you are not familiar with Chalk cloth – it’s a black leather-like fabric designed to be used just like a chalkboard, but you can sew it. Sweet huh?
I ordered mine from Fabric.com, but I believe that is is available at Joann’s now. You can’t wash it - it just wipes clean with a cloth.
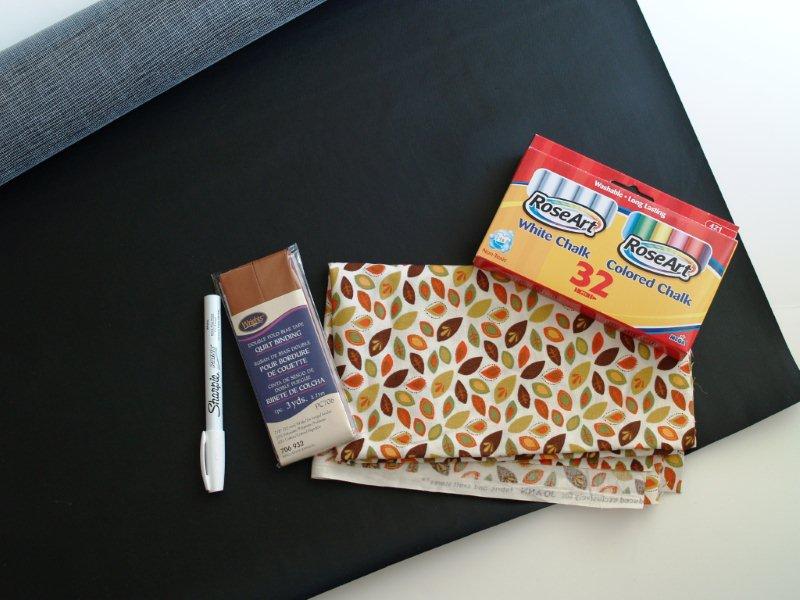
Here’s what you need if you’d like to make a placemat or two for your little ones!
Materials:
Cut your placemat pieces out.
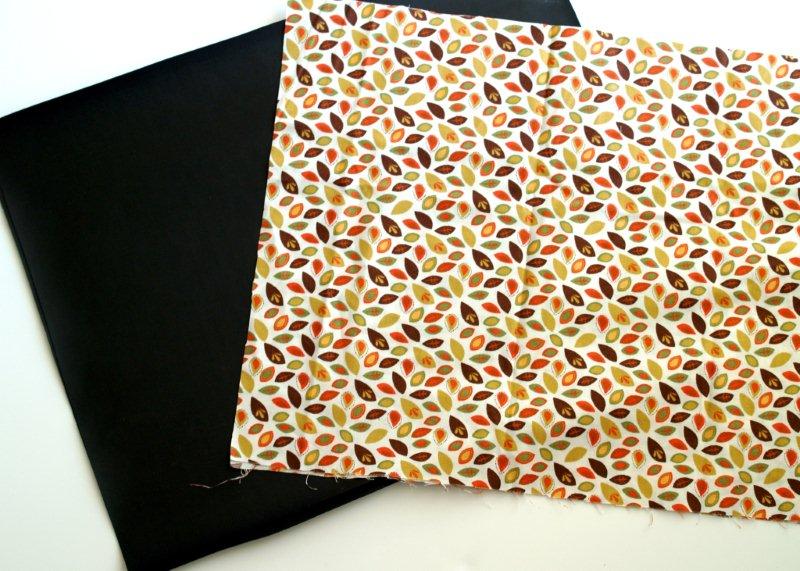
Place your pieces together, wrong sides together. If you pin the pieces together, pin them very close to the edge so the binding will cover the holes.
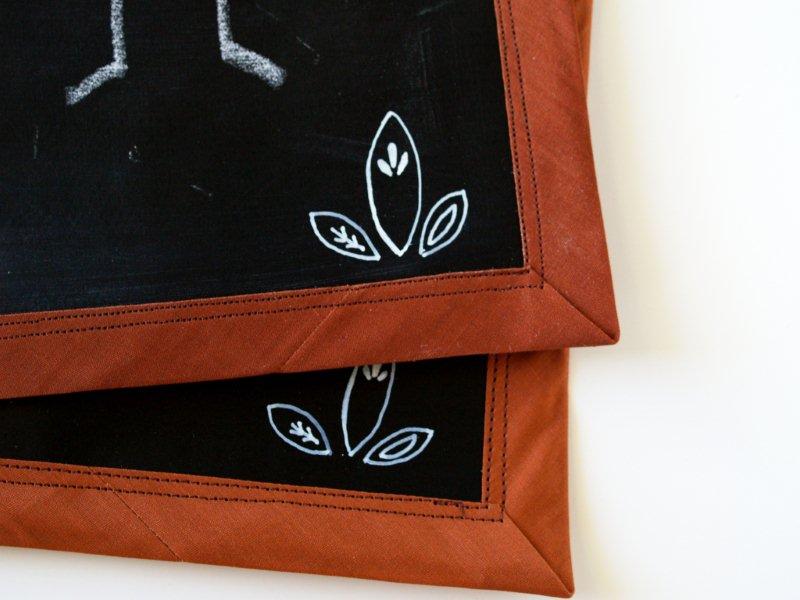
Sew your binding around the edges of the placemat. I used two rows of straight stitching. One placemat takes most of a package of double fold quilt binding.
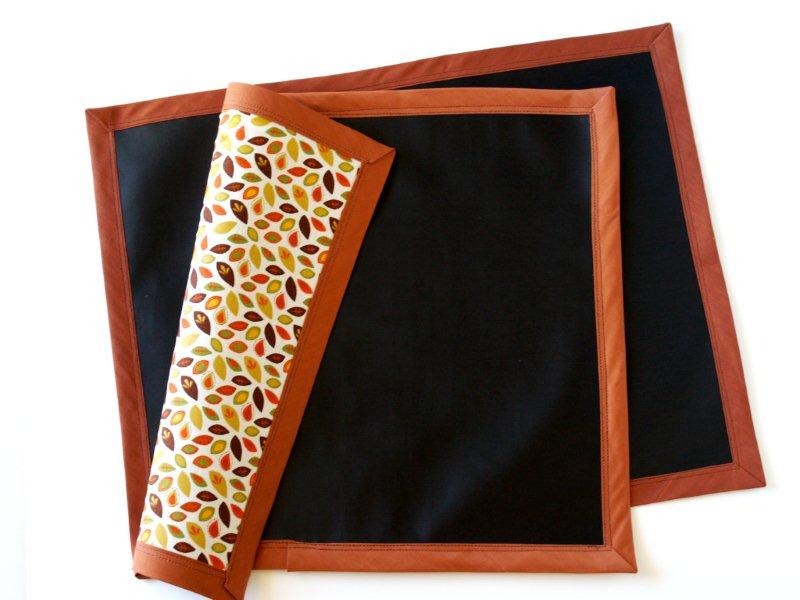
Using a paint pen, write out what you’d like to say across the top of the placemat. I wrote, “I am thankful for . . .” across the top and then some of the leaves from the fabric in the bottom right corner. I am going to add each girl’s name in front of the leaves because you know it’s always easier when things are marked with names. ;)
To prepare the chalk cloth for writing on, rub a piece of chalk over the whole placemat.
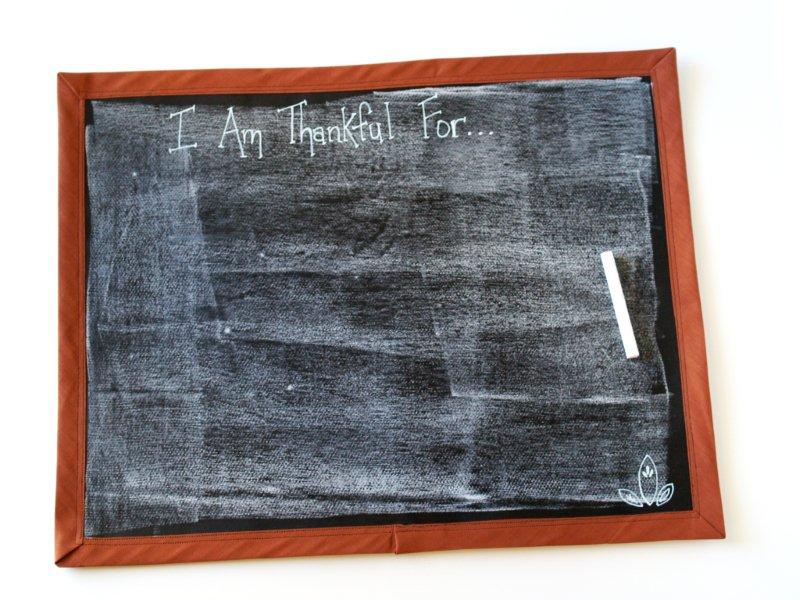
Wipe all the chalk off with a damp cloth and you’re ready to start coloring!
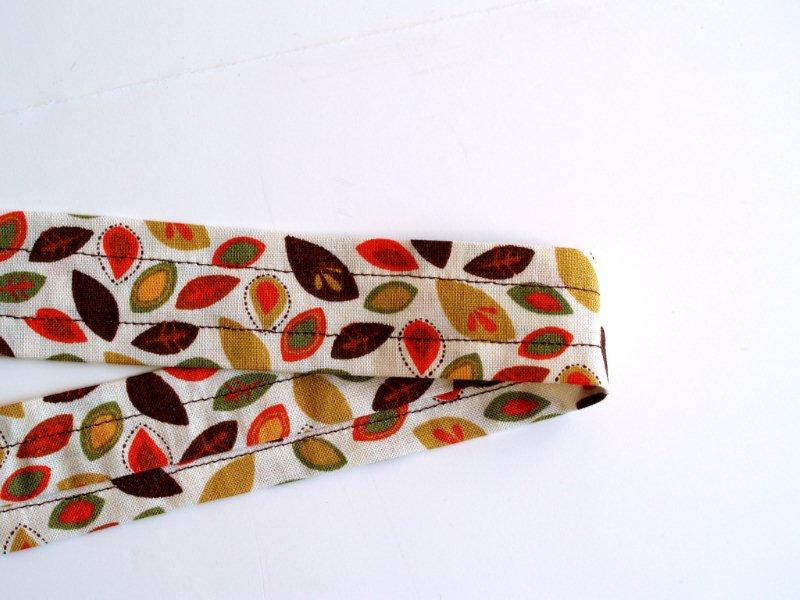
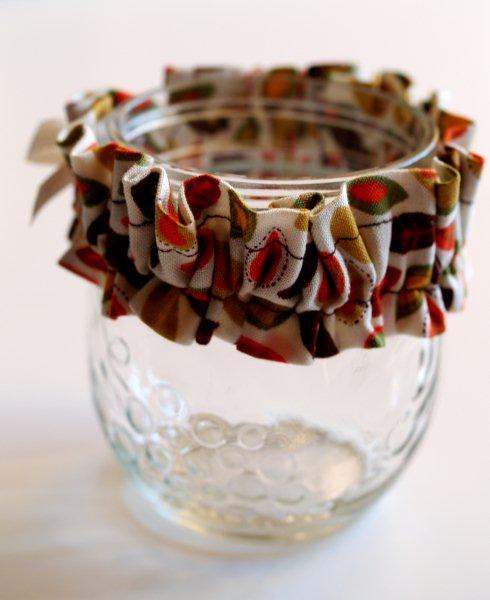
I also decorated a small jar to keep chalk in. I cut a strip of fabric, hemmed the ends, and sewed it in half.

Sew two stitching lines along the piece – so that the lines divide the rectangle into thirds.
Cut a small piece of ribbon that is long enough to tie around the rim of your chalk holder. Thread the ribbon through the center casing – between the two stitching lines.
Do not watch t.v. while threading the ribbon through the casing and pull it all the way completely through to the other side. Twice.
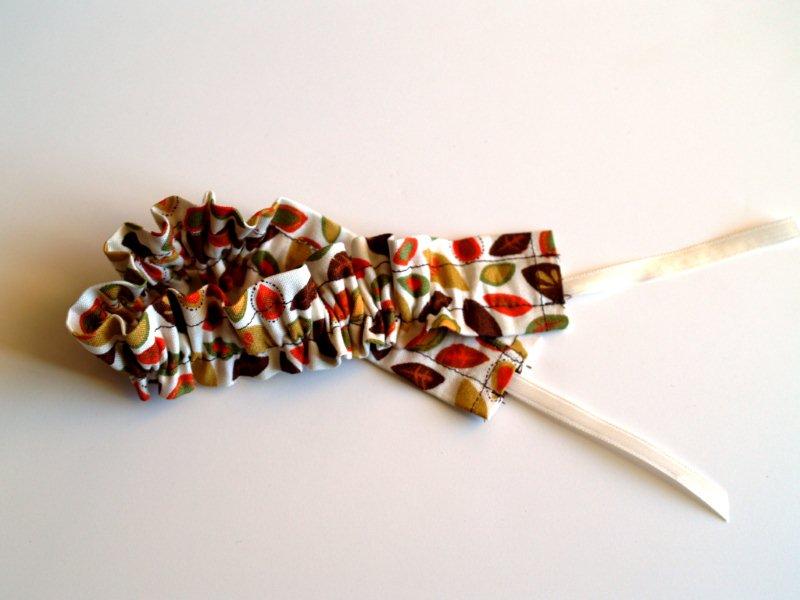
Tie the ruffle around your chalk holder – I used a little ball canning jar. So cute.
All done!! Time to start getting creative with your kids!!
I think these would be a really fun way to help your little ones focus on Thanksgiving – you could use it at home or it would be perfect to take out to a restaurant too! It would definitely help keep everyone entertained while you’re waiting for your food. You just erase the chalk with a damp paper towel.
It would be fun on Thanksgiving Day too – keeping the kids entertained while they’re waiting not so patiently for Thanksgiving dinner. Hmmmm.
But it got me thinking about my little nieces – they are really too young for something like that. I thought these fun Chalk cloth placemats would be perfect for them. You’ve probably seen Chalk cloth Fabric Placemats around – this is similar but with a Thanksgiving twist!
The placemat says, “I am thankful for” and they can draw out what they’re thankful for, and easily erase it and draw something new.
(No laughing at my stick figure family. I’m no Roo. :)
If you are not familiar with Chalk cloth – it’s a black leather-like fabric designed to be used just like a chalkboard, but you can sew it. Sweet huh?
I ordered mine from Fabric.com, but I believe that is is available at Joann’s now. You can’t wash it - it just wipes clean with a cloth.
Here’s what you need if you’d like to make a placemat or two for your little ones!
Materials:
- Chalk cloth – 14 1/2″ x 18″ per placemat
- Fabric for backing – same size
- bias tape or similar binding
- paint pen
- chalk
Cut your placemat pieces out.
Place your pieces together, wrong sides together. If you pin the pieces together, pin them very close to the edge so the binding will cover the holes.
Sew your binding around the edges of the placemat. I used two rows of straight stitching. One placemat takes most of a package of double fold quilt binding.
Using a paint pen, write out what you’d like to say across the top of the placemat. I wrote, “I am thankful for . . .” across the top and then some of the leaves from the fabric in the bottom right corner. I am going to add each girl’s name in front of the leaves because you know it’s always easier when things are marked with names. ;)
To prepare the chalk cloth for writing on, rub a piece of chalk over the whole placemat.
Wipe all the chalk off with a damp cloth and you’re ready to start coloring!
I also decorated a small jar to keep chalk in. I cut a strip of fabric, hemmed the ends, and sewed it in half.
Sew two stitching lines along the piece – so that the lines divide the rectangle into thirds.
Cut a small piece of ribbon that is long enough to tie around the rim of your chalk holder. Thread the ribbon through the center casing – between the two stitching lines.
Do not watch t.v. while threading the ribbon through the casing and pull it all the way completely through to the other side. Twice.
Tie the ruffle around your chalk holder – I used a little ball canning jar. So cute.
All done!! Time to start getting creative with your kids!!
I think these would be a really fun way to help your little ones focus on Thanksgiving – you could use it at home or it would be perfect to take out to a restaurant too! It would definitely help keep everyone entertained while you’re waiting for your food. You just erase the chalk with a damp paper towel.
It would be fun on Thanksgiving Day too – keeping the kids entertained while they’re waiting not so patiently for Thanksgiving dinner. Hmmmm.
No comments:
Post a Comment