Thursday, July 25, 2013

Crochet Pointy Flower

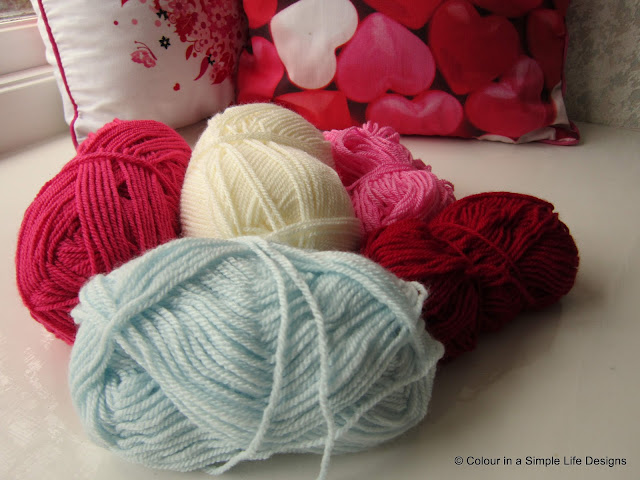
I found this Pointy Flower but it was in Sweedish so here it is for you in English
Crochet Hook: 3 mm


CO 8 ch, turn in circle.
1. round) *2 dc, 2 ch, 2 dc* repeat between ** 8 times, change color
2. round) *1sc, 4 ch, 1sc* repaet between the ** 8 times
3. round) *1 sc, 1 ch, 3 dc, 1 ch, 1 sc* repeat between the ** 8 times, change color.


4. round) *1 sc around one of the ch loop, 5 ch, 1 sc* repeat between the ** 8 times.
5. round) *1 sc, 1 ch, 4 dc, 1 ch, 1 sc* repeat between ** 8 times, change color

6. round) *1 sc (in the sc from last round), 6 ch, 1 sc* repeat between ** 8 times.

7. round) *1 sc, 1 ch, 5 dc, 1 ch, 1 sc* repeat between **, 8 times, change color


8. round) *1 sc (in the sc from last round), 7 ch, 1 sc* repeat between ** 8 times.
…from the back…


9. round) *1 sc, 1 ch, 2 dc, 1 tr, 3 ch, 1 dc in the first ch(picot), 1 tr, 2 dc, 1 ch, 1 sc* repeat between **, 8 times


  Fasten off


Monday, July 22, 2013

Granny squares Crochet


Someone sent this to me and I had to share, I will look for her website one of these days and see what else she might have, please do try to go check out the site name in the pictures, I did not make the design
But I do crochet

Now this is a color combo I like, This I will be working on soon

Bright little girly grannies appeared as if by magic...


These are loosely based on the Summer Garden Granny Square from Attic 24, but as ever I had to do it my way and changed a couple of things...  If you would like to magic up some of your own here is the pattern...

I used a 4.5 mm hook, dk yarn, American crochet terms.  Standard abbreviations and at the start of every row the 1st dc is worked with a chain 3.

To start, ch 5 (counts as 1st dc & ch 1);  (dc 1, ch 1) 7 times into the 5th chain from hook. [So you have 8 dcs each separated by a ch 1].  Join to top of 3rd starting chain with a sl st.  Fasten off.

Now into each space work 3 dc, ch 1.  Join with a sl st and fasten off.

For the final round work * (dc 3, ch 2, dc 3) in space, ch 1, (3 hdc) in space, ch 1; repeat from * 3 times more.  Join with a sl st and fasten off.

Granny Squares-Loop Daisies


Granny Squares-Loop Daisies


*sent to me by a friend *


Loopy Daisies 

With pink variegated yarn ch 8, sl st into first ch to form a ring. 

Rnd 1: Ch 1, work 12 dc into ring, join with a sl st into first dc. 

Rnd 2: Ch 1, insert hook into same st as joining, * wrap yarn around both pointer, middle and ring finger of left hand twice, draw through st (on your hook you will now have 4 stitches) drop the two loops off your fingers, yo and draw through the 4 sts on hook, insert hook into next dc, rep from * 11 times, join with a sl st into first st. 

Fasten off. 

Rnd 3: Join green yarn in any st, ch 3, in same st work 2 tr, ch 2, 3 tr, * ch 1, sk 2 sts, in next st, work 3 tr, ch 2, 3 tr, rep from * twice, ch 1, join with a sl st into top of beg ch-3. 

Fasten off. 

Now, flip the motif over so that the daisy is facing you. 

Rnd 4: Join green yarn in any ch-2 corner sp, ch 3, in same sp work 2 tr, ch 2, 3 tr, * ch 1, in next ch-1 sp work 3 tr, ch 1, work 3 tr, ch 2, 3 tr in next ch-2 corner sp rep from * twice, ch 1, work 3 tr into next ch-1 sp, ch 1, join with a sl st into top of beg ch-3. 

Rnd 5: Sl st across to ch-2 corner sp, ch 3, in same sp work 2 tr, ch 2, 3 tr, * ch 1, in next ch-1 sp work 3 tr, ch 1, in next ch-1 sp work 3 tr, ch 1, work 3 tr, ch 2, 3 tr in next ch-2 corner sp rep from * twice, ch 1, work 3 tr into next ch-1 sp, ch 1, in next ch-1 sp work 3 tr, ch-1, join with a sl st into top of beg ch-3. 

Fasten off. 

Rnd 6: Join navy yarn in any ch-2 corner sp, ch 5, work 1 tr into same sp, * ch 1, sk 1 tr, work 1 tr into next tr, ch 1, sk 1 tr, work 1 tr into next ch-1 sp, rep from * twice, ch 1, miss 1 tr, work 1 tr into next tr, ch 1, sk 1 tr, work 1 tr, ch 2, 1 tr into ch-2 corner sp, continue in pattern formation around, ending with, join with a sl st into 3rd of beg ch-5. 

Fasten off. 

Rnd 7: Join grey yarn in any ch-2 corner sp, work a round of dc to complete. 

Fasten off.

Crochet Granny Squares-pop wheel design


Granny square Pop Wheel

Pop Wheel
Ch 6, sl st into first ch to form a ring.
Rnd 1: Ch 3, work 15 tr into ring, join with a sl st into top of beg ch-3.
Fasten off.
Rnd 2: Join new colour in any tr, ch 4, * work 1 tr into next tr, ch 1, rep from * around, join with a sl st into 3rd ch of beg ch-4.
Fasten off.
Rnd 3: Join new colour in any ch-1 sp, ch 3, work 1 tr into same sp, ch 1, * work 2 tr into next ch-1 sp, ch 1, rep from * around, join with a sl st into top of beg ch-3.
Fasten off.
Rnd 4: Join new colour in any ch-1 sp, ch 3, work 2 tr into same sp, ch 1, * work 3 tr into next ch-1 sp, ch 1, rep from * around, join with a sl st into top of beg ch-3.
Fasten off.
Rnd 5: Join new colour in any ch-1 sp, ch 4, work 2 dtr, ch 2, 3 dtr into same sp, ch 1, * work 3 tr into next ch-1 sp, ch 1, work 3 tr into next ch-1 sp, ch 1, work 3 tr into next ch-1 sp, ch 1, work 3 dtr, ch 2, 3 dtr into next ch-1 sp, ch 1, rep from * around, join with a sl st into top of beg ch-3.
Fasten off

You can make blankets, bags and so many things once you get these going

Grandma's Jello cookies


I have a couple new recipes today to share with you for Jello Cookies

Kids will like to make these and you wont have to bother adding food coloring

they are so bright and just make you want to smile
When the kids come to grandma's they want something to do, well this will make them smile


Jello cookies

Ingredients
3.5 cups flour
1 tsp baking powder
1.5 cups salted butter softened
1 cup sugar
1 egg
1 tsp vanilla
4 (3 oz) pkg jello You can use any flavors you want

Instructions
Beat butter in large bowl with mixer until creamy. Add sugar and beat until light and fluffy. Blend in egg and vanilla. Mix flour and baking powder in a separate bowl. Gradually beat in flour mixture.
Divide dough into 4 sections. Sprinkle 2 Tb of jello onto each section. Knead together with dough. You may want to add a few drops of food coloring to make the dough more vibrant.
Shape dough into 1-inch balls. Roll in the extra jello from the packets. Place, 2 inches apart, on baking sheets. Flatten with bottom of bowl.
Bake 8 to 10 min at 350 on lined baking sheets. Cool on baking sheets 2 min. Remove to wire racks and cool completely.
***
Jello Cookies


1 cup sugar
1/4 tsp. salt
2/3 cup egg whites
1 tsp. almond or vanilla extract
4 oz. pkg. shredded coconut


Combine Jello powder with sugar and salt. While beating the egg whites
at high speed with mixer, using 2 qt. mixing bowl, add Jello mixture and
extract. Continue to beat till glossy and stiff peaks form. Add coconut.
Drop by rounded teaspoonful onto brown-paper lined (lightly greased
also) cookie sheet, 2" apart. Bake at 275 degrees (very slow oven) about
40 to 45 mins. or till they begin to brown very lightly and feel "set"
to the touch. Remove from paper carefully, and almost at once. Makes 4
dozen.

Mini (barbie and other) Doll Crochet handbags

Bunches of Barbie Bags - Crochet Patterns


I found this on ravelry free and so I am sharing. after all it was free. You can go there and do a search for the pattern to copy as well. Barbie bags! Because we know with all the clothes Barbie has, she simply must have bags to match!

Here are a set of 4 bags for Barbie. All open and can be used to put small items in (perhaps Barbie needs to tote around some shoes or sunnies, who knows!) They use varying hooks and yarns so please read the supplies list on each one. There is a large granny bag, a produce bag (just like the string ones mum takes to the stores!!), a handbag with a front flap and a little basket type bag.

So onto the bags!

1. Granny Bag
2.5mm and fingering weight yarn (fine baby)
I used Moda Vera Gelato
Make 2

R1: ch4, join to make a loop.

R2: ch3, dc twice more into the loop *ch2, dc 3 times* 3 times, join. (ch2's make the corners, you should have a very small square)

R3: sl st across to the first ch2 corner space, ch3, dc into the space 2 times, ch2, dc into the same space 3 times (one corner complete) *ch1, dc 3 times, ch2, dc 3 times* into the remaining 3 corners, join with a sl st. Finish off and weave in ends.

Place the 2 squares together and join your yarn with a sl st in a corner. sc evenly around 3 sides of the squares which will stitch them together to form the bag. Be sure to put 2-3 sc in the corners to help the bag retain its square shape. when you get to the top of the bag do not end off. Chain 30 to make the bags handle, sl st to the opposite corner to join the handle. End off and weave in ends.

Homemade beauty Tips using Matcha Green Tea Powder


Got those dark eye circles?? well here's a cure that will help them
DIY Instant Dark Circle and Puffy Eye Reliever


Why it works:

Matcha green tea contains tannins and tannins help shrink swollen tissue.
Caffeine from the tea constricts blood vessels to reduce swelling and dark circles.

What you will need:

1/4 tsp of matcha green tea powder (you can find this at an Asian market,health food store or online here
1/2 cup of warm filtered water
Ice cube tray

* You can also use pre-brewed green tea from the tea bags. Use 4 tea bags for every cup of water and brew on the stove for 10-15 minutes.

Directions:

Mix together the matcha green tea with 1/2 cup of warm water (the warm water helps it dissolve) and fill up the ice trays with it and let freeze. If you are using the tea from the tea bags simply fill as many ice trays as you wish after you are done brewing.
Once the ice cubes are set you are ready to start your de-puffing beauty treatment! Or you can save them in the freezer for when you need them.
Before applying under the eyes do a quick water rinse of the ice cube to remove any freezer frost.
Rub the ice cube under your eyes (or all over your face for ultimate benefits) for about 4-5 minutes.
Check yourself out in the mirror and brave the day as a new refreshed gal (or guy)!
***
another tip to use with this product

DIY Rejuvenating Green Tea Matcha Mask


A new year means a fresh start. A fresh start not only to your health but also to the way you take care of your skin. Incorporating a mask into your skin care regime is a great place to start. Maybe your skin needs a New Year's boost. This incredible mask will do just that.

Matcha powder is a powerful antioxidant that will stimulate dead skin cells and improve tired, dull skin. This is one of my favorite "secret" (not so secret anymore) masks. It makes your skin feel and look like silk.

What you will need:

Matcha green tea powder -- I purchase mine from a local Asian Market. You can also find at a specialty health food store or online amazon (try searching for matcha green tea powder)
Water* You can use aloe vera gel instead of water if your skin is dry.


Directions:

Mix one tsp of matcha powder with a few drops of either water or aloe vera gel until you have a paste. If your mask is too watery add more powder. If it is too sticky add more water.
Apply the mask to your face with a soft facial brush.
Leave on for 20 minutes and then remove with warm water and a soft washcloth.
Follow up with a moisturizer.

For optimal results, this mask should be done 2-3 times per week .