Saturday, January 5, 2013

Tiny Elf or Doll accents

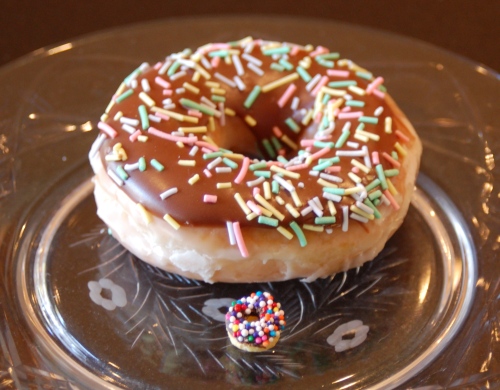
The big boy is from Krispy Kreme. The mini is Emma's version.


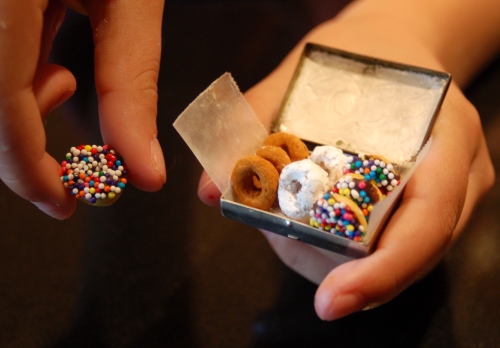
The box of donuts is really a pill box....Emma's holding her favorite, a cheerio dipped in chocolate, then sprinkles. The others are cheerio dipped in confectioners' sugar and cheerios rolled in cinnamon sugar.
The box of donuts is really a pill box....Emma's holding her favorite, a cheerio dipped in chocolate, then sprinkles. The others are cheerios dipped in confectioners' sugar and cheerios rolled in cinnamon sugar.


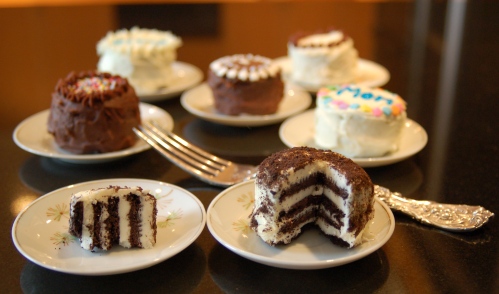
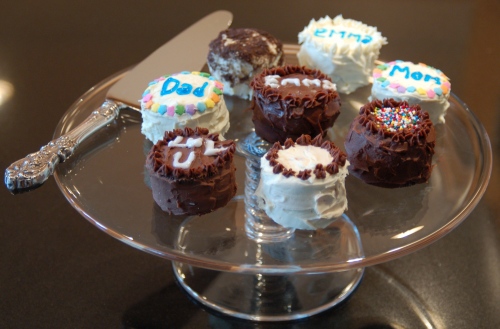
A selection of Emma's mini cakes.


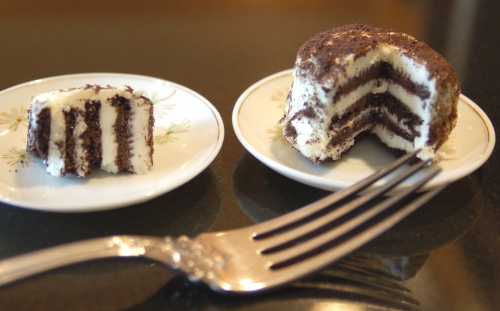
The mini cakes are really oreos with a layer of frosting between them, then more frosting on tops and sides...plus decorations.


The cakes should "rest" before anyone tries cutting a slice so the oreos have a chance to soften and become, yes, cakelike. Emma used a small pastry tip to make florettes and tubes of colored gels for the lettering.
The cakes should "rest" before anyone tries cutting a slice so the oreos have a chance to soften and become, yes, cake-like. Emma used a small pastry tip to make florettes and tubes of colored gels for the lettering.


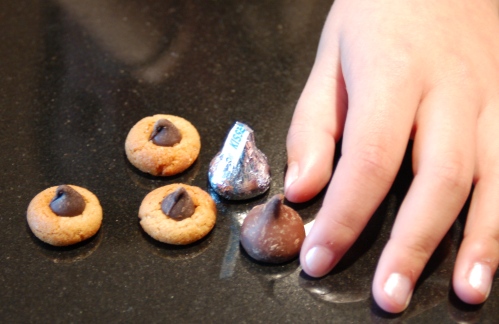
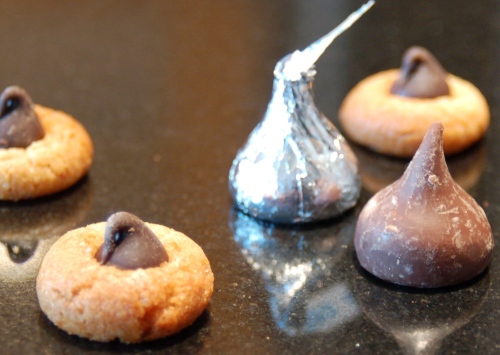
You can see by comparing Emma's hand to these peanut butter thumbprint cookies just how teeny they are.


Emma used store-bought peanut-butter cookie dough and regular-size chocolate chips.
Emma used store-bought peanut-butter cookie dough and regular-size chocolate chips instead of the standard Hershey's Kiss..


This mini cone is really a Bugle and a "scoop" of seasoned cream cheese (you can use a melon ball-er, or just roll in the palm of your hands). Kids like sugared cream cheese and fruit-flavored (think strawberry) cream cheese. Bigger kids enjoy salt-and-white-pepper (vanilla) and smoked-salmon (strawberry) flavors.


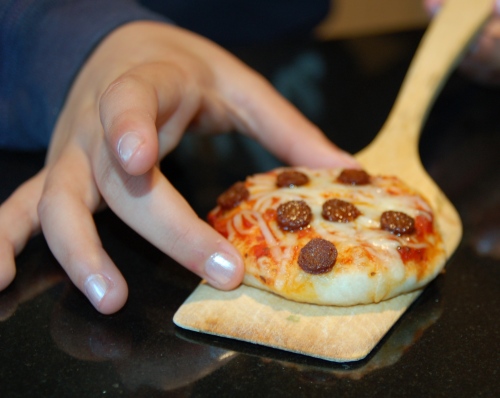
Pizza anyone?
Pizza anyone?


Yup, those are Slim Jim's Emma sliced to make her pepperoni.


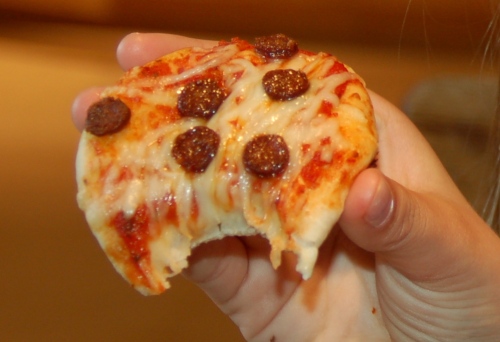
Mmmm.
Mmmm.


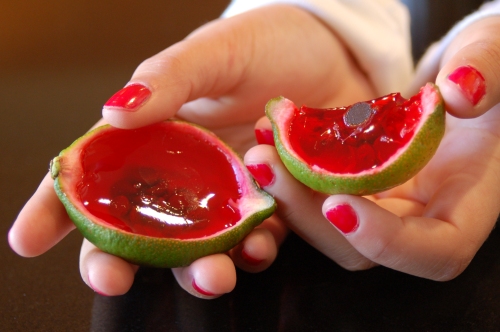
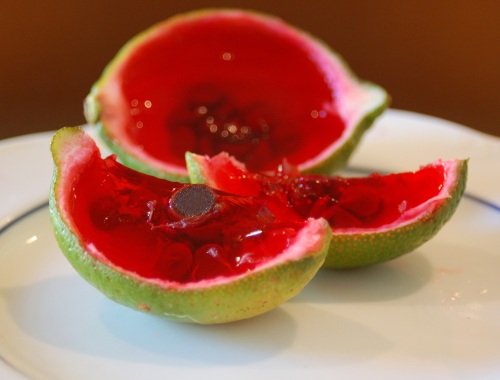
Last but not least: Emma's watermelon--she cuts a lime in half lengthwise, scoops out the pulp, fills with strawberry jello, tosses in a few mini-chips for seeds...and refrigerates until set.


Pretty cute, no? What's your fave?


51dvpemxpcl_sl160_pisitb-sticker-arrow-dptopright12-18_sh30_ou01_aa115_One day, Emma came home from a playdate with her friend Annie with a rectangular take-out soy-sauce dish filled with the mini donuts. I was in love…what a great cooking project! Then, she told me the idea came from an American Girl book, Tiny Treats. We got one immediately, and Emma started making one or two every weekend–get this…instead of TV time!!! That’s just about the best recommendation I can give! I couldn’t even tell you which is my favorite—I think they’re all so adorable. Which is yours?

New Year 2013

Looking back at 2012, thinking it was a pretty good year, Beginning in Janurary my bf returned to CA after 3 weeks of holiday joy, I was sad and me and my family all missed him. I know now that he had to return because he couldn't stand going without a drink for any longer. Sadly looking back I realize that he wasn't as strong as he claimed to be and was suffering from depression, due to job loss and it got worse when he returned to CA alone and he actually missed me and my family terribly. He had no reason to stay in CA all alone though and my family wondered why he wanted to remain out there, we sadly all know why now. Through 2012 he continued to make excuses why he had to stay in CA even though he would say he was moving, here to OK, where he was born to begin with and he wanted to marry me and be happy. I wanted to have a stress free, fight free relationship so I went along with all his stories believing every word. In the back of my mind I had doubts and I should have listened to myself.
So the year went on month after month holiday after holiday, including valentine's and then his birthday, which as he said, no matter what people don't remain apart for birthdays, yet when his came there was no trip plans made, the year before we spent several days, holidays and made lots of trips back and forth to be together and work at a long distant relationship. Plans were made for when he aquired a new job and then moving would be in order, then new plans were made that he was going to move to Oklahoma to be with me and close to my family since I had kids and he never had any, still things got worse throughout 2012. Finally I had enough and so I told him that I was going to leave for CA and we would have to work things out face to face. He agreed he missed me very much and it would be wonderful to hug and see me after so many months. So I packed and made ready to leave my home, then he calls and says that it's not a good time and that I need to stay home, he admitted to drinking and that he would sober up and make plans to come out to me for the holidays, but that he had a really bad case of flu and couldn't hardly walk, which alerted me that this genius of man had fallen into deeper depression and that I needed to get him help fast.
So I called for help but by the time I could get anyone to listen to me and due to the fact that my bf was such a good liar, making up detailed stories of his actions which included seeing a physciatrist seeking counciling, seeing family members, and going places for job interviews and other things, all this had been nothing but lies over and over for 8 months now, and he was almost dead.
 had a new baby grand daughter born in February, she is so beautiful

Lace Covered Jars


Don't have time or space to craft your own? I make them and sell them for you. Email me mscheriluv@hotmail.com

New style to old Jars or new around your home. Need a candle holder? A vase? Take old jars you have or go to the dollar type stores and buy some then just add some pretty lace, you can do colors too. It's easy and beautiful.

To make the lace wrapped jar, I simply cut a length of lace as long as the circumference of the jar. I then used Mod Podge and a paint brush to glue the lace to the bottom of the jar. Once it had dried I applied a second coat of Mod Podge.


Tuesday, January 1, 2013

Apple pie chimichangas

Ingredients
For the Apple Pie Filling
  • 4 baking apples, chopped (I used a mix of granny smith and gala apples)
  • 1 1/2 cups water
  • 1/4 cup cornstarch
  • 3/4 cup sugar
  • 1/2 tsp. cinnamon
  • 1/4 tsp. salt
  • 1 Tbs. lemon juice
For the Chimichangas
  • 8-10 small tortillas
  • 1/2 cup sugar
  • 1 Tbs. cinnamon
  • Oil for frying
Instructions
For the Apple Pie Filling
Combine the water, cornstarch, sugar, cinnamon, salt, and lemon juice in a medium saucepan and bring to a boil. Cook for approximately 3 minutes, or until the mixture becomes very thick.
Add the chopped apples and reduce to a simmer. Allow the apple mixture to simmer until the apples become just tender (approximately 10 minutes). Allow the mixture to cool.
For the Chimichangas
Mix cinnamon and sugar in a shallow bowl and set aside.
Spoon apple pie filling across the bottom 1/3 of the tortilla.
Roll in both sides of the tortilla before rolling up the bottom of the tortilla over the filling, and then continue to roll the tortilla up like a burrito.
Meanwhile, heat a small skillet with 1/2 an inch of oil. Once oil is hot, fry the chimichangas on all sides until the tortilla turns golden brown. (approximately 30 seconds on each side)
Remove the chimichangas to a paper towel-lined plate and allow to drain briefly. Immediately roll the warm chimichanga in the cinnamon sugar mixture to coat and serve.
You can serve the chimichangas drizzled with caramel sauce if you desire.
I desired so I drizzled caramel sauce over my chimi…and it blew my ever lovin’ mind.
There were a few extra of these little babies and I rewarmed them in the microwave the next day and they were STILL fabulous.
So, to all of you who are reading this post…do yourself a HUGE favor. Make a fried apple pie burrito/Apple Cinnamon Dessert Chimichanga. You deserve it.
You don’t even have to love apples to love these. You just have to love fabulous food.

Fabric Peony Flowers

DIY Fabric Peony Flower Accessories + Gift Toppers These are beautiful thanks to the crafter for the idea.

Hi friends! Today I'm excited to share a follow-up to my DIY Fabric Poppy Flower Gift Toppers that I posted this past November. For this project we'll use the same basic process that I shared last time, and then add just a few more steps to create some gorgeous Peony Accessories and Gift Toppers that are perfect for Springtime!

.
-------------------------------------------------------------------------------------------------------------------
Here's what you'll need to make your own Fabric Peony Flowers:
  • A ventilated work space
  • Candle
  • Lighter or matches
  • Chiffon or lightweight satin (available at fabric stores) - your fabric needs to be 100% polyester in order to work properly | peonies come in colors of white, soft to bright pinks, and vibrant fuchsia
  • Fabric scissors
  • Embroidery thread in yellow
  • Sewing needle
  • Barrette, hair comb, or headband (optional) — for hair accessory
  • Blank pin back (optional) — for brooch
  • Double-sided adhesive dots (optional) —for gift topper

Step 1: Prep your fabric. Cut out 5 squares of chiffon (per 1 complete flower). Four should measure around 3.5 to 4 inches across and one should be a bit smaller. Snip around the edges to round them into rough circles. They don't need to be perfect.

Step 2: Creating the petals. Hold one circle of chiffon close to the side of your flame moving your hand back-and-forth slowly until the edges curl up. Rotate the circle around until all edges have been curled. Be sure not to hold the fabric too close to the flame or it may burn. The fabric does get hot, so use caution as you work. It's a good idea to keep a glass of water close by just in case you need to dunk a burning petal in it. I've never needed to do this, but it's always wise to be prepared. Repeat this process with all 5 petals.

It's a little bit difficult to describe the petal making process in words, so if you'd like you can watch my quick video tutorial here for the complete process. I have done my best to write all the steps out (and illustrate them with photos here within this post, but some things are just easier to understand in action. Even without the sound on, the video should make sense. I added notes throughout the video for those of you who need to watch with the sound off. If for some reason you need extra help on any of the steps, please be sure to let me know. I'm happy to help.

Step 3: Use your fabric scissors to snip all five of your petals in 4 sections as shown in the diagram here. Be sure that you don't cut all the way across, or your petal will fall apart.


Step 4: Use your flame to curl up the sides along each newly cut edge. This time around it will help to hold the fabric above the flame, using two hands to hold the cut edges apart from one another as you work. If the petals stick together after curling you can pull or snip them apart. Repeat with all five petals. Set two larger petals and the smallest petal aside.

Step 5: Create the middle layer. Take the remaining two petals that you prepared in the last step, and snip them in four sections again...like seen in the diagram here. The black dashes are your new snip lines, and the grey ones show where you snipped last time. Curl the newly cut edges of your two remaining petals up with your candle and set aside.


Step 5: Prepare a small yellow pom pom out of embroidery floss. For a quick how-to, you can check out my DIY Pom Pom video tutorial here...or follow these steps: A. Wrap a length of embroidery floss around pointer and middle finger tips approximately 8 times. Use a small piece of floss to tie around the entire looped area. B. Carefully pull looped floss off fingers and tighten knot to create a secured bundle. Knot once more for extra security. C. Snip through all loops and trim them to similar lengths as needed. D. Hold your pom pom with ends facing up and down (not side to side) and then use your fingers to flatten it down. Set aside.

Step 6: Assemble your flower. Begin by stacking the two large layers that have only four petals each inside of one another. Next, stack the two layers that have eight petals each on top of the bottom two layers. Finally, add the small layer with only four petals on top.

Step 7: Place your pom pom inside the center of your flower and stitch it in place. Sew through all layers several time until it is secure. And now you have a gorgeous fabric peony!
You can use your peonies for all sorts of lovely things! For example, you can use them to dress up the table at your next party...
Attach one to a hair clip (stitch it on or glue it with a dab of hot glue), or add a pin back to create a cheery brooch...
Use a couple to dress up an Easter basket:
Or you can use them my favorite way...as gift embellishments! Just adhere double-sided sticky dots to the back of your flowers and attach them to your gifts:
Please note: This project is not intended for young children. Please work in a ventilated work space. Never leave candles unattended and use caution near open flame. For safety, keep a glass of water or extinguisher close by in case of a flare up (this has never happened to me...but I want everyone to be safe).

Looking back on 2012

Looking back at 2012, thinking it was a pretty good year, Beginning in Janurary my bf returned to CA after 3 weeks of holiday joy, I was sad and me and my family all missed him. I know now that he had to return because he couldn't stand going without a drink for any longer. Sadly looking back I realize that he wasn't as strong as he claimed to be and was suffering from depression, due to job loss and it got worse when he returned to CA alone and he actually missed me and my family terribly. He had no reason to stay in CA all alone though and my family wondered why he wanted to remain out there, we sadly all know why now. Through 2012 he continued to make excuses why he had to stay in CA even though he would say he was moving, here to OK, where he was born to begin with and he wanted to marry me and be happy. I wanted to have a stress free, fight free relationship so I went along with all his stories believing every word. In the back of my mind I had doubts and I should have listened to myself.
So the year went on month after month holiday after holiday, including valentine's and then his birthday, which as he said, no matter what people don't remain apart for birthdays, yet when his came there was no trip plans made, the year before we spent several days, holidays and made lots of trips back and forth to be together and work at a long distant relationship. Plans were made for when he aquired a new job and then moving would be in order, then new plans were made that he was going to move to Oklahoma to be with me and close to my family since I had kids and he never had any, still things got worse throughout 2012. Finally I had enough and so I told him that I was going to leave for CA and we would have to work things out face to face. He agreed he missed me very much and it would be wonderful to hug and see me after so many months. So I packed and made ready to leave my home, then he calls and says that it's not a good time and that I need to stay home, he admitted to drinking and that he would sober up and make plans to come out to me for the holidays, but that he had a really bad case of flu and couldn't hardly walk, which alerted me that this genius of man had fallen into deeper depression and that I needed to get him help fast.
So I called for help but by the time I could get anyone to listen to me and due to the fact that my bf was such a good liar, making up detailed stories of his actions which included seeing a physciatrist seeking counciling, seeing family members, and going places for job interviews and other things, all this had been nothing but lies over and over for 8 months now, and he was almost dead.
I did manage to finally get help, but he was in such bad shape that his kidneys were just barely workig and his liver was totally dead. He was put in the hospital and I rushed out to be with him, they moved him to ICU in just 3 days because he became worse, and I saw before me a sad helpless man who shut the world out and ruined not only his life, but damaged my heart and our future. He was concious throughout his condition. He knew what was happening although he talked like it was still just flu and he was going to get better, even though he was bed ridden, he would return to OK with me in a few days.
I prepared myself to take care of him to the end no matter how long we had together, to make it a happy time and show him love. His mother however was indifferent to that idea, and said she would take care of him to his dying day, she is controlling and over bearing and hateful and I do believe that she doesn't want to see anyone happy, because she lives such a miserable hateful life, due to her own dealings.
I sat there day after day, night after night all alone in CA, hours at the hospital, at his empty apartment for days, thinking, Why am I sitting here when he was a  smarter man than to do this to us, and why am I putting up with his mother whom, he had shut out of his life, and now I can see why.
To my face she would thank me for saving his life, then she continued to make plans to give up his apartment and get rid of his belongings, she objected to me moving him to OK where he would be cared for and loved. His evil mother continued to carry on, screaming at me, his nurses, his doctors and then asking us to forgive her the next, crazy as she is. The final straw came when she said she could move him to Vegas to her home and turn his dead father's office into his bedroom and he would remain there with her and that I could give up my family and life and go there to stay with them. The more I listened to things and watched the angrier and the more pain I suffered, he had been nothing but wonderful the year before and I still don't understand how such a brilliant kind caring man can turn into a self destroyer.
I realized that was the end for us and that it was time to gather up my belongings and pack away a few of the things he loved most so she wouldn't destroy his entire memories, that I would have for him in the slightest chance that he heal and return to me. So I told him that I must return home and that I wished him the fastest recovery and would keep in touch daily waiting for him.
I returned home and so my life goes on without him, his mother the wicked heartless soul and him deserve each other. So be it
On the good side of 2012 I had a new baby grand daughter born in February, she is so beautiful. My grand children are the sunshine of my life and I enjoy everyday I spend with them and my children.
I have children who don't live close enough to me that I can see weekly and I miss them very much and try to keep in touch with them as much as possible.
I look forward to 2013 to be a bright new year with more ups than downs this year, and in any new relationship I will be more cautious to really on my inner feelings more. I have always been more open and maybe it was the fact that I tried a long distance relationship that made this difficult and I probably wont try long distance again.
Busy Baby BLocKs noise Makers

Busy Baby Blocks!

My grand daughter comes over to my house and she loves to get hold of my bead containerssharing

NOTE: If you like what you see and read on my blog - PLEASE take 3 seconds to vote for me! Just click on the Circle of Moms badge at the top of my blog, find my blog name on the list (I believe I am in the 40's area), and click on the hand to cast your vote! You do not need to be a member to vote. Thanks so much!!! :)


If you have an infant, then you probably already know about the "changing table wiggles (or maybe I should say -woes)". Simply described: you place your infant on the changing pad and instantly the body of the child becomes a twisting, grasping mass where anything remotely close by (and even some things you thought were unreachable) is considered fair game in said infant's eyes.

Solution? Well, you could always put toys nearby, but then they might not be readily available for play later on when you need them. And who really wants to wash a teddy bear or toy that came into accidental contact with a dirty diaper? Not I.

Then I had an "AHA!" moment.

Now, I am not sure when the "aha" moment actually occurred - but does it really matter? What is more important is that I HAD an "aha" moment. :)

I had been storing up a few small Gerber baby food containers because they just seemed so perfect for...well...for something. So I thought, why not put objects inside them to create noise, glue them shut and keep a few close by to hand the baby as a distraction during a diaper change. And of course, I didn't want them to look...well.."blah", so paint would have to be involved. Thus, "busy baby blocks" were born.

Now, before I tell you how to make these easy, peasy "blocks" - PLEASE keep two things in mind:

1. NEVER leave your baby alone with these. I tried to make these safe in case my baby did manage to pop one open, but they are NOT something I would be comfortable throwing in a crib or pack-n-play while I have my back turned away.

2. These are not the "holy grail" of distraction. Yes, they may keep your child occupied for a bit - but eventually (like most toys) your child will outgrow them or just start looking for another sparkly or noisy thing nearby. Don't be discouraged - just eat some chocolate and think of this as an opportunity for finding another creative solution. :) But in the meantime, enjoy the moments when your baby is enthralled by his/her new "busy baby blocks".


What you will need:
**Gerber containers
**paint (non-toxic)
**glue gun
**safe items to put inside the "blocks". This is VERY important. For safety's sake, just assume your infant will one day figure out how to pry open a lid, so you want to make sure that whatever is inside the block will not be a problem if the child does. (Examples: just a few grains of rice - if your child managed to open a block and swallow too many, it could be dangerous so only use a very small amount, little bit of dry oatmeal flakes - again use only a very small amount, broken cheerios, large jingle bells. I used VERY large jingle bells that would be hard for my baby to swallow (although not impossible for him to get stuck in his mouth) if he ever did manage to open the block. HOWEVER, keep in mind that if the small ball in the jingle bell falls out, that could be a serious hazard. You may want to further safety proof them by placing the bells in a small mesh bag first and then placing the bag inside the block OR just skip the bells altogether.

Directions:

1. Paint the INSIDE of the Gerber container and lid. If you want to have a two color design, paint with one color first and let it dry. Then go back over the inside with a different color (see photo below).
P.S. My daughter helped me paint some of these, so this might be a fun activity for older siblings to work on with you. :)
IMPORTANT: Don't paint the inside rim of the lid that overhangs when the container is closed. That part is exposed to the outside ultimately and thus exposed to baby's mouth. Your paint SHOULD be NON-TOXIC, but who really wants paint of any sort in their baby's mouth?

2. Add items to each container.


3. Working rapidly with your glue gun, make a line of hot glue along the edge of the container and quickly press the lid onto the container.


4. Check the entire block to make sure all paint on the outside has been removed. Check to make sure the lid is really secure on each block.

5. Place in a box or basket close to the changing table and let your baby enjoy!

Fair Isle Mice - pattern

Fair Isle Mice - pattern

My grandmother used to make tiny felt mice that were a lot like these so I want to make some.

Cute little knitted mice with a colourful Fair Isle band. A great way to use up your oddments of yarn.

To make your own mice, you will need-
Oddments of double knitting weight yarn in main colour and 5 contrasting colours
A pair of 3.75 needles
Toy stuffing

ABBREVIATIONS
k = knit
p = purl
sts = stitches
inc = increase
k2tog = knit 2 sts together
k2togtbl = knit 2 sts together through the back of the loops

Finished size – 3 inches long (excluding tail)

BODY
(Starting at tail end of mouse)
With main shade and 3.75mm needles cast on 9 sts, leaving a long end to make tail.
Row 1: k 1, inc knitwise in every st to end. (17 sts)
Row 2: p
Row 3: k 1, inc knitwise in every st to end. (33 sts)
Row 4: p
Row 5: k
Row 6: p
Rows 7 – 13: work Fair Isle pattern from chart.


Row 14: p
Row 15: K2tog, k 8, k2tog, k 9, k2togtbl, k 8, k2togtbl. (29 sts)
Row 16: p
Row 17: K2tog, k 7, k2tog, k 7, k2togtbl, k 7, k2togtbl. (25 sts)
Row 18: p
Row 19: K2tog, k 6, k2tog, k 5, k2togtbl, k 6, k2togtbl. (21 sts)
Row 20: p
Row 21: K2tog, k 4, k2tog, k 5, k2togtbl, k 4, k2togtbl. (17 sts)
Row 22: p
Row 23: K2tog, k 3, k2tog, k 3, k2togtbl, k 3, k2togtbl. (13 sts)
Row 24: p
Row 25: K2tog, k 2, k2tog, k 1, k2togtbl, k 2, k2togtbl. (9 sts)
Break off yarn and thread through remaining sts and pull up tight. Fasten off.


EARS (make 2!)
With main shade and 3.75mm needles cast on 3 sts.
Row 1: inc knitwise in every st. (6 sts)
Row 2: k
Row 3: k
Row 4: k
Row 5: k2tog, k 2, k2togtbl. (4 sts)
Row 6: k2tog, k2togtbl. (2 sts)
Row 7: k2tog.
Fasten off.


MAKING UP
Sew up seam on body and stuff.
With the long tail from the cast on, make a twisted cord of about 5 inches in length to form the tail.
Attach the ears to the head and embroider eyes.