Showing posts with label Crochet. Show all posts

Tuesday, May 15, 2018

Mandala Blankets


Hi there, spring is blooming and so is this beautiful Mandala Blanket in gorgeous spring colors.
It is hand crocheted. I can make you  one in many beautiful colors.
They start at $150.00 this one is between 5-6ft. Lots of time and love goes into each item I make. They are blessed and made in a smoke free home. High quality yarn is used in each one. They do take several days, even weeks to make so you will need to get orders in so I can fit you into my busy schedule. I do require deposits on each item ordered and shipping depends on your location so I will have to figure that when we set up your order. Paypal is accepted, there is a small paypal fee for each order. You can reach me on facebook my page https://www.facebook.com/CherylsCookingandCraftingatHome/ or email


questions?? Just find me on facebook
thanks for looking and SHARE AND LIKE AND FOLLOW MY PAGES

Monday, April 24, 2017

Crochet Beautiful Colorful Pillows

#crochet #crochetpillows #flowercrochet

Hello followers and viewers I am in love with spring, always love the fresh air, the beautiful new flowers popping up once again after that long cold winter, don't get me wrong I love winter too, but after several long gloomy cold weeks of winter I am again thankful for popping fresh spring days, fresh smells and beautiful spring colors and to celebrate spring days, here are my pretty spring pillows.

These are granny squares simply crochet big enough to cover pillow forms or
to fit the size you want for your pillow, one side forms a pretty granny square and the other side is a bright pretty triangle 
I closed up the pillow with a single crochet stitch on top of the edges and it stands up just a little 
but I really like the look on these using a different color yarn

The yarns I used with these are sweet rolls and trimmed out with a blue yarn I had left over from another project.
This love of my pillows is a bright colorful
Zinnia Pillow
I found the pattern from
littlemonkeyscrochet
I did my pillow in bright spring colors
she has hers in solid colors
check them out for the pattern
It has inspired me for some new ideas

Hope you are inspired to create some crochet art of your own too
Have a happy spring and a great month
Stay tuned for more ideas soon


Thursday, February 16, 2017

Crochet Troll Hat


My grand daughters have made these hats in high demand around here. Let me just say the HAIR is enough to drive one crazy, my recommendation is to take your time on pulling the hair.
You have to unwind each strand and I used a doggy wire brush, but make sure you do it on a table and pull firmly while holding the hat carefully. I also used a regular hair brush to get the yarn unwound and really smoothed it with the dog brush.
There are some videos on youtube but most I found were in spanish or some other language so they were no help to me, you might get some tips.

work the hair a row at a time in the beginning till you get it brushed out
smoothing it out before adding bangs
before adding the hair band and flowers
she's almost complete


Pattern

Abbreviations:
ch(s) = Chain(s) sc = Single Crochet
sp(s) = space(s)
st(s) = stitch(es)
sl st = Slip Stitch
sk = Skip
Dc (dec )= Double crochet decrees
Mc = Magic circle
hdc = Half Double Crochet
RS = Right Side
WS = Wrong Side
FO = Finish Off
Hdc(dec) = Half double crochet decrease
Tr= Treble

Materials:
Super saver – Shocking pink or similar
Red Heart or other source – Mint, Turquoise, Deep pink, black,
white

Hook- 5mm(H)
Needle
Tape measure tape
bristle brush
Scissors
Stitch markers

**Notes – Everything is worked in rounds unless stated otherwise. 

Child (5-10)
(Fits 20″ circumference, 12-12.5″ in height)
Hook- 5mm(H)
Using a pink yarn.
Round 1: Magic circle 8 hdc (8)
Round 2-3: hdc each st around. (8)
Round 4: 2 hdc in each st around. (16)
th
Round 5-6: hdc each st around. (16)
Round 7: hdc in first st, 2 hdc the next st, repeat around. (24)
Round 8-9: hdc each st around. (24)
Round 10: hdc the first 2 st(s), 2 hdc the next st, repeat around. (32)
Round 11-12: hdc each st around. (32)
Round 13: hdc the first 3 st(s), 2 hdc the next st, repeat around. (40)
Round 14-15: hdc each st around. (40)
Round 16: hdc the first 4 st(s), 2 hdc the next st, repeat around. (48)
Round 17: hdc each st around. (48)
Round 18: hdc the first 5 st(s), 2 hdc the next st, repeat around. (56)
Round 19: hdc each st around. (56)
Round 20: hdc the first 6 st(s), 2 hdc the next st, repeat around. (64)
Round 21-33: hdc each st around (64)

Eye’s 
(Make 2 of each part)

Bottom (white)
Round 1: Mc 4hdc, 3 dc, 4hdc, 3dc pull tight and slst ch 1 (14)
Round 2: 2 hdc 4 times, 2 dc 3 times, 2hdc 4 times 2 dc 3 times slst and tie off leaving a tail for
sewing. (28)
Middle (dark Pink)
Round 1: Magic circle 6hdc. (6)
Round 2: 2 hdc in the first st, 2 dc in the next st, 2 hdc in the next 2 sts, 2dc in the next st, 2 hdc in the
last slst and tie off leaving a tail for sewing. (12)
Top (Black)
Round 1: Magic circle 6 hdc slst and tie off leaving a tail for sewing. (6)
First Sew the top/black eye piece to the middle/pink eye piece. Next sew the
middle to the bottom piece. Now sew onto the middle part of your hat two rows from the bottom.I used black yarn on the eyelashes and a little curve around part of the eye. And I added a
white yarn dot on the eyes.

Troll ears (Make 2)
Round 1: Magic circle 6 hdc. Pull tight but do not join. Ch 1 Turn. (6)
Round 2: 2 hdc in each st around. Ch 2 Turn. (12)
(Note insert your hook through all 3 sts instead of 2.)
Round 2: 2 hdc in the first st, hdc the next 2 sts, repeat till the end. Ch 1 turn (16)
(Note insert your hook through all 3 sts instead of 2.)
Round 3: 2 hdc in the first st, hdc the next 3 sts, repeat till the end. Ch 2 turn (20)
(Note insert your hook through all 3 sts instead of 2.)
Round 4: Dc in the first st, sc in the next 11 sts. (dc, 2 tr) in the same st. (2 tr, dc) in the same st. sc in
the next 6 sts. Ch 1 turn. (24)
Note insert your hook through all 3 sts instead of 2.
This will help them curve inward
Round 4: slst in the next 7 sts, (dc, tr) in the same st. (tr, dc) sc in the next st. slst in the next 14 sts. Tie
off. (27)
Note add your ears one row up from the bottom. Sew half the ear and then fold the top corner of the
ear and then sew it down.


Band
I used Minty green
Hook 5mm (H)
In green
CH according to the hat base number count. Slst together ch 3.
Dc each st around. Slst and tie off

Flowers
(Make 3)
I used a pretty bright blue
Hook 5mm (H)
Blue Flowers
Round 1: Magic circle 6 hdc.m(6)
Round 2: (4 hdc) in the first st, in the next sc, Repeat this around. (14)
Slip stitch and leave tails to sew through band

Hair
Add the hair to every other row and I added some spaced in between the rows I did fully all the way down about 3" above eyes Add more where you think it needs it.
Once hair is added untwist each strand then brush out using a bristle brush
Take your time unwinding the yarn and especially combing it out.
Smooth it up and the bangs down towards the eyes side to side
I sprayed mine with some glitter hair spray when finished.


Tuesday, February 7, 2017

Making Yarn Cakes to Crochet


Everyone is crazy about the Yarn Cakes, you've seen them, Sweet Rolls, Caron Cakes, Bernat Pops and many other brands. Yeah they are nice, but some people can't get them, and the prices are in a wide range, and you know what, most of all, you can't get just the color combos you might want.
So I have figured it out, I am making homemade Yarn Cakes
It's easy, takes a little time and some planning and the best thing is you can make them out of just about any yarn you have or can find. So what are you waiting for?

First you need a winder and some patience, most of of the later, you can't be in a rush.
The winders go from price ranges I've seen over $70 down to just $15 bucks
and if you are gentle the cheaper ones work well I have had no problems with a cheaper one and what's better than having fun and saving money too.

Remember to treat you little winder with care, go slowly and be gentle
I get mine to wind more than it says by adding a larger(wider) bottom on the winder with a piece of heavy cardboard cut to fit on the spindle or a slice of plastic cut in a circle just a little bigger than the original winder base.

I like this gadget

You can use so many kinds of yarn and any color that you can buy
Take my advice, count your turns to keep track if you are making more than one cake of the same color combo
Be sure to pull out the yarn holder spindle arm till it clicks, firmly but not too hard but it will stay up
don't wind too fast to keep the yarn in place and if you add a bigger base like I do sometimes, just be sure not to cut your circle add on piece wider so it hits the yarn spindle arm and you can get bigger cakes, if you cut it right it slides right down over the center of the winder and can give you about a half inch more of a cake
pace yourself and you can get lots of good use out of this tool
I am on a Roll ....LOL Literally now
stay tuned for more fun

Thursday, January 26, 2017

Crochet Ripple Blanket in Rainbow Sherbet


Here is a project to use the beautiful Caron Cakes to make
This can be a baby blanket or a lapghan or make it bigger for a bed blanket, I was even thinking it would go great on my porch table in the summer

These are some of the Caron Cakes you can get online or at Michael's Craft Stores

This is a Ripple Pattern
you will need the following for a baby blanket
Materials
Yarn: Caron Cake yarn 2 spools (I used Rainbow Sherbet)
Hook: 4.25 mm (or 4.00 mm) / (G/6) / UK 7
Scissors, Yarn Needle, Stitch Marker
Stitch Legend
r – row
st(s) – stitch(es)
ch(s) – chain(s)
sl st – slip stitch
dc – double crochet

Special Stitches
Cinch Circle: cross yarn to make a loop, pass hook through loop from front to back, hook yarn and bring it back through loop to pull up a loop on your hook, chain 1. This will make, and secure, the circle. Work all successive stitches into circle over top of the shorter tail. When finished the first row of stitches, pull the shorter tail to cinch the circle shut.

Good Tips to Know
The number of stitches you should have at the end of each row will appear in parentheses for the first few rows to establish pattern
In this Pattern Ch-3 at the beginning of each row counts as a double crochet stitch
If your ch-3 begins on top of a skip stitch, sl st into the next st before chaining 3
“Peaks” are the sunburst points, “Valleys” are the dips in between
You should always have 12 Peaks and 12 corresponding Valleys
The 2 stitches at the bottom of the “Valley” are always skipped
When joining a new cake skein , begin in a ch-2 space
 If you are joining your new skein on a “Row 1 of 3” (ch 5, dc) into the ch-2 space (counts as dc, ch2, dc)
 If you are making a larger blanket, you will require more yarn!

***
Ready to Begin? Let's GO
Pattern
R1: Make a cinch circle, ch 3, 11 dc into circle, cinch shut, join with a sl st to the top of the ch-3 (12)
R2: Ch 3, dc into the same st, 2 dc into each st around. Join with a sl st to the top of the ch-3 (24)
R3: Ch 3, *skip the next st, (dc, ch 2, dc) into the next st*. Repeat from * to * around ending with (dc, ch 2) in the same st as Ch-3. Join with a sl st to the top of ch-3 (48)
R4: sl st into the next ch-2 space. Ch 3, (dc, ch 2, 2 dc) into same ch-2 space. *(2 dc, ch 2, 2 dc) into the next ch-2 space*. Repeat from * to * around. Join with a sl st to the top of the ch-3. 

R5: join new colour with a sl st in any ch-2 space. Ch 3, (dc, ch 2, 2 dc) into same space. *Dc into next st, skip 2 sts, dc into next st, (2 dc, ch 2, 2 dc) into next ch-2 space*. Repeat from * to * around until you reach the ch-3 you began with, join with a sl st.
R6: sl st into the next st, ch 3, dc into the next st, *(2 dc, ch 2, 2 dc) into the next ch-2 space, dc into the next 2 sts, skip 2 sts, dc into the next 2 sts*. Repeat from * to * around until you reach the ch-3 you began with, join with a sl st.

R7 (For repeating pattern, this is Row 1 of 3: The “Small Peak Motif” Row): (if you are on a “Valley” stitch, sl st into the next st to start row) ch 3, dc into each stitch up to the ch-2 space *(dc, ch 2, dc) into the ch-2 space, dc into each st down to the “bottom of the valley”, skip the 2 “valley” sts, dc into each st back to the ch-2 space*. Repeat from * to * around until you reach the ch-3 you began with, join with a sl st. Place a stitch marker on this row to mark it as a “Pattern Row 1”. 
(no stitch count increase)
R8 (For repeating pattern, this is Row 2 of 3: Regular “Peak Motif” Row): (if you are on a “Valley” stitch, sl st into the next st to start row) ch 3, dc into each stitch up to the ch-2 space *(2 dc, ch 2, 2 dc) into the ch-2 space, dc into each st down to the “bottom of the valley”, skip the 2 “valley” sts, dc into each st back to the ch-2 space*. Repeat from * to * around until you reach the ch-3 you began with, join with a sl st. 
(stitch count will increase by 24 sts)
R9 (For repeating pattern, this is Row 3 of 3: Regular “Peak Motif” Row): (if you are on a “Valley” stitch, sl st into the next st to start row) ch 3, dc into each stitch up to the ch-2 space *(2 dc, ch 2, 2 dc) into the ch-2 space, dc into each st down to the “bottom of the valley”, skip the 2 “valley” sts, dc into each st back to the ch-2 space*. Repeat from * to * around until you reach the ch-3 you began with, join with a sl st. 
(stitch count will increase by 24 sts)
Repeat Row 7, 8 and 9 making sure to move your stitch marker to the “1 of 3” row each time you make it.

Wednesday, January 18, 2017

Crochet Lavender Puzzle Scarf and Gloves


This is such a pretty set I call it Lavender Puzzle Scarf and Gloves because it looks like puzzle pieces

I used 2 skeins of yarn for this set  Caron® Simply Soft® Ombres™

For the scarf it's simple
INSTRUCTIONS
Ch 30.
1st row: (RS). 1 sc in 2nd ch from hook. Ch 3. 1 sc in next ch. *Skip next ch. 1 sc in next ch. Ch 3. 1 sc in next ch. Rep from * to end of chain. Turn. 10 ch-3 sps.
2nd row: Ch 1. *(1 sc. Ch 3. 1 sc) in next ch-3 sp. Rep from * to end of row. Turn.
Rep last row until Scarf measures 64" [152.5 cm]. Fasten off.

For the Fingerless Gloves
Materials:
4.50mm Crochet Hook
Yarn Caron® Simply Soft® Ombres™
Scissors
Tapestry/ Wool Needle

Instructions:
Taking your hook and wool make a 
Slip Knot then chain 30 Chain Stitches.  Join to first chain with a Slip Stitch, but be very careful not to twist the chain!
Row 1~ Chain 2 then Half Double Crochet in each chain all the way around. Join with slip stitch to the second chain of the last stitch. 
Row 2,3,4,5,6~  Chain up 2. Half double crochet in every stitch all the way around. Join with slip stitch to the second chain of the last stitch.  
{If you have larger hands you can easily make the palm/hand space longer by adding a few more rows.}

Row 7~  Chain up 2. Half double crochet in the next 9 stitches. Now it's time to make the hole for the thumb. Chain 4 then skip next 4 stitches. Half double crochet in the  remaining stitches. As always, join with a slip stitch to the second chain of the last stitch.

Row 8, 9, 10, 11, 12, 13, 14, 15~ Chain up 2. Half double crochet in every stitch all the way around. Join with slip stitch to the second chain of the last stitch.
Note~ If you would like your gloves to be longer, just simply add more rows!

Row 16~ Here around the edge I did the same stitch as in the scarf with 
1 sc in 2nd ch from hook. Ch 3. 1 sc in next ch. *Skip next ch. 1 sc in next ch. Ch 3. 1 sc in next ch. Rep from * to end of chain to both top and bottom of gloves. Weave in ends.
So pretty

Unicorn Hoodies

Happy Winter Blues days...It's chilly we made it through and ice storm, wasn't too bad, didn't lose power so I can live with that.
I have been busy crocheting, birthdays, sewing and I am taking time to sit down and update my blog

Today I present the Unicorn Hoodies
This is so soft and floppy and warm and cozy
I used The soft Blanket Yarn for the body and most of the mane
I used a smaller twine type for the Unicorn horn
I really love how it turned out
The scarf has pockets sewn together at the bottom for little hands
but you can wrap it around the hood either way
its soft and droopy and if you make it right your child can get a good couple of years out of this one
I used hdc stitches 
The horn is single crochet and a little stuffing 
and the mane is simply tassels cut and pulled through where I wanted them.

2 of my sweeties love these

Sunday, October 9, 2016

Blanket Yarn Using V-Stitch Pattern


Well I'm hooked on the blanket yarns!! THEY are SO SOFT and easy to work with and they look so pretty.

SO I went yarn shopping and got a bunch of colors for some projects. I'm so excited with these
All of this is blanket yarn except for the Yellow which is for a Superman
Blanket for a Full Size Bed I'm slowly working on.
So many pretty colors

So the first blanket I finished tonight
This blanket is made using The V-Stitch
The V-stitch right now is to work the double crochet without the chain space in the center of the V. This fabric will have a row of V stitches with one dc stitch on either end of the row. Here's how to do it:
So simple and easy to make
I used 5 large skeins of Blanket Yarn
Start by crocheting a chain of 90 Stitches 
THEN 
  1. Crochet a foundation chain that is a multiple of 6. In this example, I've crocheted a starting chain of 90
  2. 2 dc in 4th chain from hook. (This is the V-stitch).
  3. *Skip 1, 2 dc in next ch*
  4. Repeat *to* until there are two chains left.
  5. Sk 1, dc in last ch. This completes your first row of V-stitches bordered by 1 dc on either end of the row.
  6. Now you're ready to start your next row, so turn the work and ch 3 for you first dc of the new row.
  7. Skip 2, 2 dc in the space between the two dc that make the V from the row below.
  8. Repeat across the V-stitches of the row below.
  9. Skip 1, dc in last ch.
  10. Repeat until the project is the length you desire. Finish off and weave in ends.
That's easy and fun to do and this makes up quick and looks pretty you can make so many color combinations.


Tuesday, June 21, 2016

Crochet Trimmed Flip Flop


So summer is officially here, I celebrated Summer Solstice on June 20th this year; in style with grilled food, salads, and lots of sunshine, extreme heat,my garden wilted and I watered but all in all it was a blessed day. So what did I do in my spare time? I started these cute and creative Crochet trimmed Flip Flops and they are a trend setter, I've already gotten several requests for them in all sizes and colors and I'm having lots of fun finding cute yarns to get creative and decorating them up.

They are easy if you have the time to make your own or you can order from me and I will ship anywhere in the USA.


Thursday, February 4, 2016

My Crochet Fringe Cowl


I just pulled this off the hook this week, I love it, it's thick and warm and so pretty 
I love the fringe on it, and it's easy to crochet
I love the rich colors in this yarn and how it turned out
It was fast and easy to make, the fringe really adds fun to it


Monday, February 17, 2014

Baby Owl Cocoon Project

My final Project is Finished and it turned out so Cute
Everyone is asking me for the Pattern and to make more


I have seen several cocoon patterns out and around and I have a few this is my version
I just love it, it takes lots of time, let me tell you but all so worth it.
You can also make several different hats to go with it

Tuesday, February 11, 2014

My New Texting, Fingerless Gloves, I just love these

Do you put on Gloves and then have to take at least one off all the time to answer your phone or Text?
Yeah Me too, and I get so tired of it, so I decided it's time for Texting Gloves
THESE are the best things, I'm so Glad I decided to make some and now I am going to try all different kinds of Designs. So many colors and styles I can think of to make and I've seen tons of cute ideas
Here are a couple that have been really popular
There is always Classic Black
Got to have a Pair

These are so cute with Jeans Especially and who doesn't wear Jeans???
I make them in ALL Sizes too
Child's sizes

Winter Crochet Time-The Scarves!!

So in order to keep the winter Blahs away, I find Crocheting is one of the crafts I especially like to do

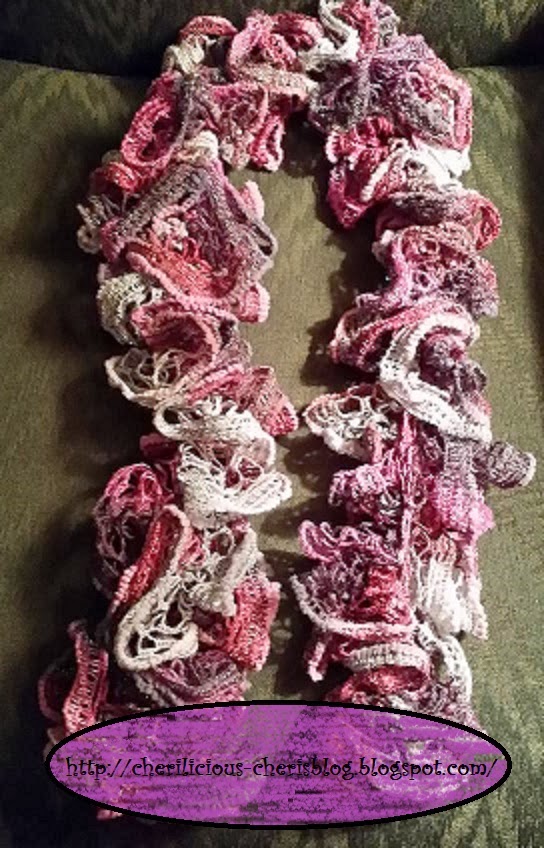
I have been having so much fun Crocheting ALL Kinds of Scarves, Ruffle, Infinity and colors and yarns
are so much fun to make with these.

I've done several of the easy and fast Ruffle scarfs and sell them all the time, you can order yours from me as well.
Here are a few pictures of some that I have made and I will be happy to help you with colors and how to
There are so many pretty colors
I love Purples
This one is especially good for Valentine's Day

Then the Fur Yarns and Oh so Inspired for Winter fun
The Fun Fizzle Yarns make really cute Scarfs
These are all made by ME
;You need to contact me to Put your orders in today
Then you know what I decided to try out?
Arm Knitting and it's really fast and fun
All of these are lots of work, don't get me wrong
but worth the enjoyment you get out of designing every piece of ART
This one is so pretty in person, it has an iridescent Glitter that just makes it SPARKLE
I have had so much fun this Cold COLD Winter 
stay so busy and love every minute of life


Monday, August 12, 2013

OWLS OWLS OWLS and more OWLS

Owls are the cutest things and the hottest craze right now right?
So I am collecting OWL things and patterns and making OWLS this year
Well I am happy to show you a cute Free baby owl crochet pattern so go get the instructions to make this
A few months ago I made this adorable hat for one of my baby granddaughters
She was so cute and it was a little big, but she can probably wear it this winter too.
I have several owl patterns and most I have found for free
It pays to search well. ;)


Tuesday, July 30, 2013

How to crochet a hexagon step by step Tutorial


This tutorial is being shared

The hexagon is bang on trend right now, and this versatile motif can be used in a number of different projects. In this tutorial you will learn how to make a crochet hexagon table runner. If you’ve always wanted to learn how to crochet, follow our series of Crochet Fundamentals. This pattern uses US terms and stitches include single crochet (sc); single crochet 3 together (sc3tog); double crochet (dc); treble crochet (tr); treble crochet 3 together (tr3tog); slip stitch (sl st) and chain (ch).


Supplies
Yarn (I use Drops Paris cotton yarn by Garnstudio in complementary colours)
A crochet hook
A darning needle for sewing in the ends
A pair of scissors
Click here to learn more about essential crochet tools
1. Crochet the Hexagons
Step 1

Crochet enough hexagons for your table runner design. In this tutorial I made 17 hexagons. To learn how to make a hexagon, check out our tutorial here (with video): How To Crochet a Hexagon.
2. Join your Hexagons
Step 1

Now that you have your hexagons, it’s time to crochet them together into one big piece. Lay out your hexagons in a design that you like.
Step 2

To crochet the squares together: grab two and put them wrong side together; then single crochet along the sides through the inside loops only. This creates a nice ridge. If you prefer something a little more flat, you can try slip stitching them together. Use a color that complements the hexagons; I chose off-white to join my hexagons.

I joined my hexagons from top to bottom first; then I crocheted the horizontal sides together. Sew in the ends after this step.
3. Crochet the Border
Step 1

Now that all your hexagons are joined, it’s time to put a border around them. This gives your piece a nice finished look. Again, choose colors that will complement your hexagon piece. I chose off-white and sand as the colors for my border.

Start on any side, and in the back loops only, single crochet your way around the piece. When you get to a corner, work 1 single crochet in the first chain of the chain 2 space of the corner, chain 1, then work 1 single crochet in the next chain.

Continue until you reach a ‘valley’; work 1 single crochet in the first chain of the chain 2 space; work 1 single crochet through both second chains of the left and right hexagon; then work 1 single crochet in the second chain of the chain 2 space of the next hexagon. Continue like this around the entire piece and fasten off.
Step 2

With a new color, start on any side with a standing stitch (begin with a slip knot on your hook and begin from there). We’re going to go around the piece using treble crochets. When you get to a corner, work 1 treble crochet in the chain 1 space from the previous round, chain 1 and work another treble crochet in the same space.

Continue until you reach the ‘valley’; work 1 tr3tog in the next 3 stitches. To make a tr3tog stitch, do the following: *yarn over twice, insert hook into next stitch, yarn over, pull up a loop, (yarn over, draw through 2 loops) twice, repeat from * two more times, yarn over, draw through all loops on hook. You’re crocheting 3 treble crochet stitches together with this stitch. Make sure the middle stitch goes through the center single crochet in the valley from the previous round. Continue like this around the entire piece and fasten off.
Step 3

With the same color as step 1, start on any side. We’re going to go around the piece using single crochets again. When you get to a corner, work 1 single crochet in the chain 1 space from the previous round, chain 1 and work another single crochet in the same space.

Continue until you reach the ‘valley’; work 1 sc3tog in the next 3 stitches. To make a sc3tog stitch, do the following: *insert your hook in next stitch, yarn over, pull loop through stitch* 3 times (4 loops on hook), yarn over and draw yarn through all 4 loops on hook. You’re crocheting 3 single crochet stitches together with this stitch. Make sure the middle stitch goes through the tr3tog stitch from the previous round. Continue like this around the entire piece and fasten off.
Step 4

Fasten off (weave in) any yarn ends your piece might have.

Now crochet your own project, table runner, afghan !!

Tahiti tropical crochet flower

Tahiti tropical crochet flower
Today I found a pattern for this quick easy pretty tropical flower
Enjoy


Use a 2mm hook and 4ply yarn


Begin with 8 chain and join with a sl st.

Round 1: 1 chain then into the base ring do 1 dc, [ do 3 ch, then into base ring do 1 dtr, 3 ch, 1dc into base ring] Pull stitches close to form a neat petal. Repeat 6x more to make 7 petals. Sl st into first dc.

Round 2: Sl st into each of next three chain and the dtr stitch below. [12 ch, 1tr into 9th chain from hook, 3 ch, sl st to top of next dtr below which is the top of the next petal.] Repeat 6x more and there will be 7 petals. The final sl st goes into the 1st chain stitch not the dtr stitch below.

Round 3: Work 3 sl st . * Do 3ch, [then into 8 chain space below do 1 tr, 3 ch] x4 Then Sl st into treble stitch below. Work 3 sl st down the chain towards the tip of the inner petal, then 3 sl st back up the chain away from the inner petal. *

Repeat from * to * 6x more. After seven petals do just 3 sl st and stop where the round began.

Round 4: [Do 3 dc into each of the next three chain spaces.
Into next chain space do 1 dc, 1 htr, 1dtr, 1 htr, 1 dc,


Do 3 dc into each of the next three chain spaces] Repeat 6x more so all 7 petals are done. Sl st and cast off.

Thursday, July 25, 2013

Crochet Pointy Flower

I found this Pointy Flower but it was in Sweedish so here it is for you in English
Crochet Hook: 3 mm


CO 8 ch, turn in circle.
1. round) *2 dc, 2 ch, 2 dc* repeat between ** 8 times, change color
2. round) *1sc, 4 ch, 1sc* repaet between the ** 8 times
3. round) *1 sc, 1 ch, 3 dc, 1 ch, 1 sc* repeat between the ** 8 times, change color.


4. round) *1 sc around one of the ch loop, 5 ch, 1 sc* repeat between the ** 8 times.
5. round) *1 sc, 1 ch, 4 dc, 1 ch, 1 sc* repeat between ** 8 times, change color

6. round) *1 sc (in the sc from last round), 6 ch, 1 sc* repeat between ** 8 times.

7. round) *1 sc, 1 ch, 5 dc, 1 ch, 1 sc* repeat between **, 8 times, change color


8. round) *1 sc (in the sc from last round), 7 ch, 1 sc* repeat between ** 8 times.
…from the back…


9. round) *1 sc, 1 ch, 2 dc, 1 tr, 3 ch, 1 dc in the first ch(picot), 1 tr, 2 dc, 1 ch, 1 sc* repeat between **, 8 times


  Fasten off