Monday, January 21, 2013

Making Wire Lettering

Wedding Banner Idea on lettering


Update: See other banners with wrapped wire lettering here. Visit my Etsy Shop.
This summer I’ve been invited to two weddings, with the first being held on June 25th on Cape Cod. Both the bride and groom are designers and I thought they would like something artsy and personal for a wedding gift.

I started by writing out Karen & Graham in a flowing script and then enlarging it to a lower case height of about 1/2″ . Then, using long-nosed pliers, I bent some 32 gauge cloth wrapped wire, using the hand written lettering as a guide.

This is a technique that I figured out while sewing the book cover design for my up-coming children’s book, Pocketful of Posies, which you can see here. I wanted letters that were raised enough to create shadows. And because the wire was a separate flexible piece, it was easy to move the words around for proper positioning on the artwork.

After determining the size of the names and their placement, I cut out a square of orange wool felt and added my customary wavy edge and some cut out holes. I then wrapped the wire with 2-ply variegated embroidery floss, hiding the knots in the back.

This is where I do most of my work, on an old ironing board.

The light green floss wrapped wire didn’t provide enough contrast with the background, so I wrapped a single strand of dark green floss around the wire, candy cane style.

The banner was cut out of a light teal colored wool felt that matched Karen & Graham’s invitation. Then I blanket stitched around the orange felt edges with pink variegated embroidery floss. I chose some fish beads and a heart made of bone to decorate around the wedding date.

Then I made some tiny 1/4″ roses following Mimi Kirchner’s great instructions from her easy felt rose tutorial. Some silk ribbon leaves were added, too.

After I figured out how much space to leave for the date and beads, I cut out the scalloped bottom edge of the banner. The outside edge was blanket stitched with some variegated pima cotton (Caron Collection). From my collection of stuff, I picked out some more beads and some beach stone pendants with holes drilled in them to hang from the scallops.

I then stitched the floss wrapped wire words and numbers in place and sewed the beads and stone pendants to the banner. It needed some color on the bottom to balance the orange square on top, so I added another clump of felt roses and silk ribbon leaves.

I made a sleeve of felt at the top and slipped a piece of driftwood through. After drilling 2 holes in the driftwood, I threaded some pima cotton through and braided a strap for hanging the banner.

Here is the finished banner, which I hope Karen & Graham will enjoy for many years!

Glitter Letters

That’s what I love about this industry…you are able to learn something new {almost} everyday. Sometimes it’s can be something simple, sometimes it’s something really cool and other times you smack yourself on the forehead and say, “Why didn’t I think of that before!?” Well, the other day I was at Scrapper’s Boutique, my local scrapbook store where I work and teach, and the owner showed me this cool technique that she had done on chipboard with glitter and Diamond Glaze/Crystal Effects. It was one of those “Wow this is cool AND why didn’t I think of that?” moments, so I thought that I would share.
I’m actually going to start with the finish product/project and work my way to the details. This is the card that I made with the letter S having the Glazed Glitter technique {that’s just the name I came up with, call it what you will} applied…
susicard
By the way, the paper that I used might just be my new favorite. It’s the Quite Contrary line from My Mind’s Eye. I LOVE LOVE LOVE it! I got picked mine up from Emma’s Paperie.
Here’s a detail shot of the S tag on the card…
susicard_detail
This technique is really quite simple, but I thought that I would show the step outs on how it is done. It’s so much easier to show things in pictures instead of trying to “show” them just in words. I wish I had the time to make more tutorials. Maybe this is a start! ;)
Supplies needed: chipboard or thick cardstock die cut, Diamond Glaze/Crystal Effects, fine glitter, adhesive to apply glitter {the MS glitter glue that came with the glitter is shown}.
supplies
Apply adhesive to your chipboard. NOTE/TIP: I used a foam brush to ensure that I got a thin, even layer over the entire piece. Generously sprinkle glitter and shake off excess…
sprinkleglitter
glitterapplied
Apply Diamond Glaze/Crystal Effects over the top of the glitter…
applyce
ceapplied
Allow to dry thoroughly and then attach to project.
Here are a couple more detail shots of the S. Pictures really don’t do it justice! It’s so smooth, shiny and glittery all at once. I really wish that I would have learned this before Valentine’s day so I could have done it on hearts on Valentine projects. I’m pretty sure that I will be doing this on just about everything that needs a little bling!
s_dry
s-on-tag_detail
So what do you think? Pretty cool, no? Let me know if you use this on any of your projects, as I would love to see what you come up with, too.

hooded Towels for Toddlers

These are hooded Towels for Toddlers, nice and fluffy
I make them one with their name on it and one with a fun appliqued shape on the back. These towels are super easy to make, needing only limited sewing know-how. And they make for great birthday or baby shower presents for others.
Bath Towel Hoody
Supplies for Bath Towel Hoodies:
  • one large bath towel – any color
  • one hand towel – any color
  • fabric for letters – can be anything. I use fleece and it does pill, but I don’t mind as it doesn’t fray.
  • scissors, pins, sewing machine
  • extras: ric-rac, double bias tape
hoody-supplies
First, cut your hand towel in half horizontally. Then lay out your large bath towel on the floor and center one of the cut pieces of hand towel on top of the towel. Put the cut side up, so that the sewn end in the one being sewn to the large bath towel, then you don’t have to fold over the edge.
hoody-cut-half
Updated: You only need one half of the hand towel to make one hooded bath towel. I usually buy 1 hand towel and 2 bath towels, and it gives me two hooded bath towels. hoody-cut-side-up
Pin the cut hand towel to the large towel and sew in place. It doesn’t really matter how you sew them together, I actually like to sew them on top of each other, not right sides together. But either is fine.
hoody-ends-on-tophoody-pinned
Fold your hood together in half, pairing the cut side together. Sew this together. I don’t mind that the seams show and will fray a little after washing, this is the part that is on the inside and their heads cover that.
hoody-pin-hoodhoody-inside
You could be done here, but I like to add a few extras, a name or a shape to the back that I applique to the towel. I’m no expert and not a perfectionist, so most times the applique comes out a little wonky! I cut out letters/shape from fabric, pin them on, sew around each with a zig-zag stitch and call it good!

Valentine Countdown Project and Tutorial

Valentine Countdown Project and Tutorial

This is the project I decided to make!


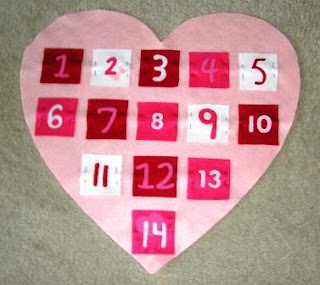
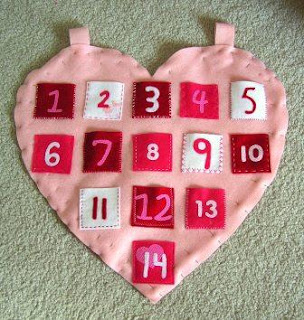
I've been busy working on this Valentine's Day Countdown for my daughter the past few days. It hangs on our front closet in our great room, and I am so happy with the way it came out! It's made out of felt and is by far my most ambitious sewing project to date. I did a combination of hand embroidery and some machine sewing because I wanted an eclectic artsy look to it. This is also the first time I've ever used fusible webbing, and I love that stuff. I may use it on every project from now on!

I knew I wanted a heart shape with pockets. The pockets would be small, too small to put much in. I decided that we'd put a little card in each pocket, each one with something that we love about our daughter right now. Something very specific, so it'd help us capture who she is right now.

One thing I wrote was, I love how you call band aides, "Ban-bans," and how you always put your hand up to your forehead every time you think you're hurt, and cry, "I need ban-ban, NOW! I really hurt Mama!" The last time it was because you dropped your doll Chloe down the stairs. I told you that Chloe was probably hurt, you were not.

Every day we'll take out the next card and read it to her. Kind of a time capsule of sorts, to remember the quirks, the songs she sings, the games she plays right now. The plan is to also make an ongoing mini scrapbook, so that each year I can compile the fourteen things onto one little page along with a picture of her from that year. I think it'll be fun looking back over the years at the different things we write down and it'll be a nice keepsake for her too.
This year the reading the little cards as the "prize" is probably a little more abstract than she's ready for. I'm still going to write down fourteen things but I also brainstormed a list of little gifts to give her too. I'm making some of them, such as yesterday's princess clutch; I post pictures and how to's of the projects leading up to Valentine's.

Making a Felt Hanging Valentine Countdown
Making a Countdown is a fairly easy project, but can be time consuming depending on the amount of hand stitching. This is a done in a weekend project and requires beginner to moderate skill levels. I am a very novice sewer and embroiderer so only a little experience is needed.

Materials: Felt by the yard in various colors, fabric scraps, embroidery thread in various colors, sewing needle, pins, disappearing ink pen, scissors, rotary cutter, ruler, cutting mat, fusible webbing, iron and ironing board, wooden dowel, assorted ribbon, assorted papers, newspaper for template

Optional Materials: Sewing machine, computer and computer fonts, die cut alphabet and die cut machine, hot glue gun/glue sticks or paint
Step 1: Cut a large heart template out of newspaper. Lay template down on top of felt. Trace with template a disappearing ink pen. Cut out two hearts.Step 2: Cut out fourteen square templates for the pockets. Each one should be the same size. Lay them down on felt heart until you like the arrangement. My paper squares were each 3X3 inches. Step 3: Using a few different colors of felt and the dimensions of your pocket template, cut out fourteen pockets. I ended up with fourteen 3X3 squares in three different shapes. (This is when I realized I had to change the color of the heart, the red squares blended in too much against the rose colored felt.) Lay pocket squares down on top of paper pocket templates until you like the arrangement. Take a picture and refer to it as needed.
Step 4: Cut out numbers 1-14 out of various pieces of felt and fabric. I hand drew some of my numbers, and also made templates using computer fonts. To do: type numbers into word processing program. Play around with sizes and fonts until you have some you like. Print out and cut around each number leaving a bit of a margin around the numeral. Pin to felt or fabric, cut out.
Step 5: Take the cut out numbers, lay on top of felt square pockets to check design. Put each number on top of a piece of fusible webbing. Press down so they stick to webbing. Cut out number. Lay on top of felt pocket square, fuse with iron. Fuse all numbers. I also fused two little love birds onto the number 2 pocket, a small heart onto 6 (this was later to cover a stitching error), and a fabric heart onto number 14.
Please note: these were the directions on the package of my fusible webbing, read and follow the directions for the fusible webbing you are using in case they vary.Step 6: Place the fabric pocket squares with fused on numbers back onto felt heart. Pin in place. Use a combination of embroidery stitches and machine stitches to attach each square.
Step 7: Pin heart with fabric pockets onto second felt heart. Cut pieces of felt into narrow strips. Fold in half and pin at the top of the heart by the curves to make hanging tabs. Use a straight stitch to stitch around hearts. I eyeballed the width, length, and positions of the strips for the tabs.
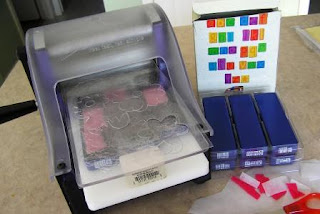
Optional Step: I have some Sizzix alphabets, and used one along with a universal die cutter by Accucut to cut letters out of felt backed with fusible webbing to spell out "happy valentine's day". I then fused the message to the top left side of the heart. The other side is blank for the pictures, but I am going to fuse our last name onto the upper right hand side. If you do not have access to a die cut system that cuts through felt, create your message using the same method as cutting out the numbers. The step can also be omitted, and top portions of heart left blank.
Step 8: Complete hanging Valentine Countdown by cutting a wooden dowel so that it is approximately as long as the widest part of the heart. I chose to cover it with fabric that matches some of the fused on numbers, but you could also paint it. Cover dowel with fabric by cutting fabric to length and attaching with hot glue.
Place dowel in hanging tabs, make bows out of wired ribbon. Attach them to front of hanging tabs with wire or thin ribbon. Tie additional ribbon around dowel by hanging tabs to make a ribbon hanger. The bows will hide where the ribbon is tied on.

Step 9: To make the cards that fit into each pocket, use paper scraps in coordinating colors and cut them to fit into your pockets, mine were 2X3 inches. Attach a piece of ribbon tied into a knot with mini glue dots to the top of each card.

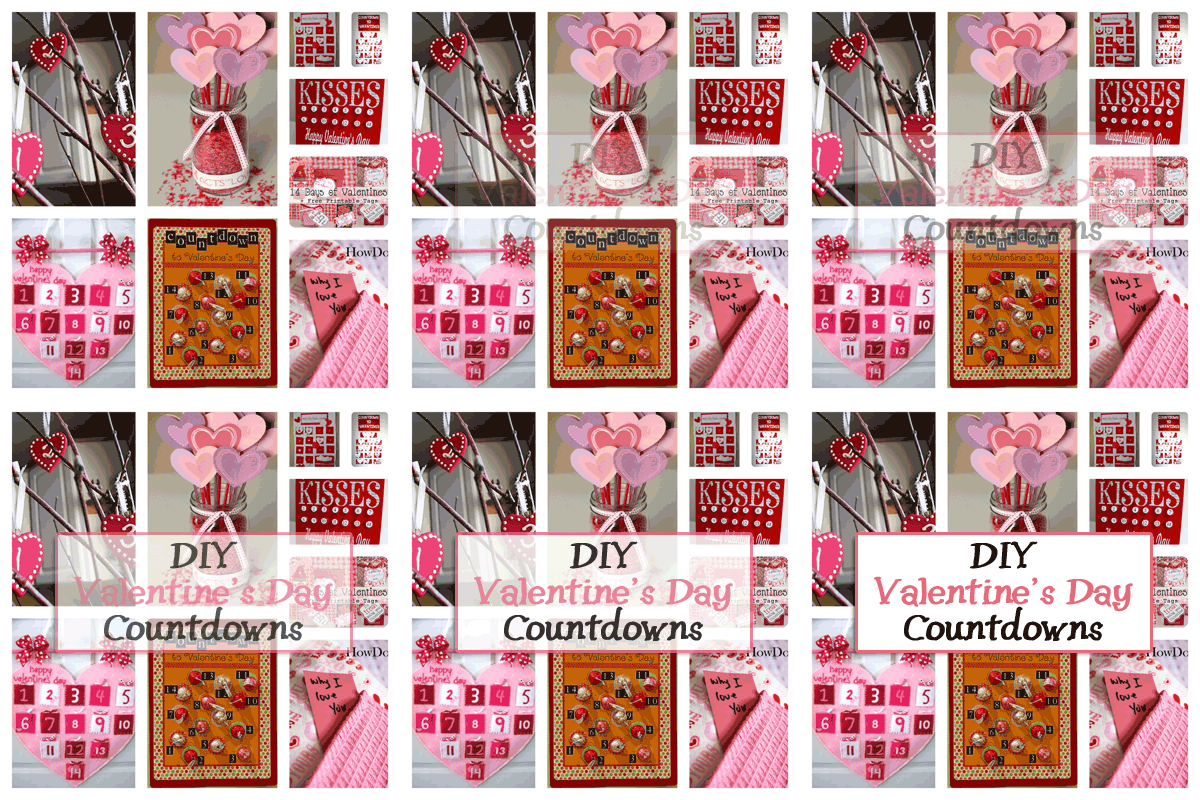
9 Great DIY Valentine’s Day Countdowns

9 Great DIY Valentine’s Day Countdowns
http://allcrafts.allcraftsblogs.com/2013/01/12/9-great-diy-valentines-day-countdowns/
Valentine Countdowns Tutorials

Create some family or marriage traditions with a Valentine’s Day Countdown. While some may say Valentine’s Day is a saccharine holiday, these tutorials show creative ways to add meaning and fun for your loved ones. Best part is that you make it yourself!
Why I Love You Pillow Tutorial
Each day, slip a sweet note into the pocket of this Why I Love You Pillow
Countdown to Kisses
Countdown with Chocolate Kisses
Use a Silhouette cutting machine to cut letters or buy store-bought letters to make this custom-made chocolate kisses holder to Countdown to Kisses this Valentine’s Day.
Felt Heart Valentines Countdown
Nice Family Tradition
Sew a sweet Felt Valentine’s Heart Countdown. Fill the pockets with sweets or notes.
Circle Kisses Valentine Countdown
One for the Boys
Just print and attach candy with glue dots to this Circles Valentine Countdown. Choose a pink or neutral version.
14-days-of-valentines
Adorable Printables
Fourteen Days of Valentines with fun printable tags and cute gift ideas for our Dear Husbands.
Scratch-Off Countdown
Homemade Scratch-offs
Uncover a fun activity each day with this Scratch-Off Valentine’s Countdown. Never made homemade scratch-offs? Try it – they’re fun.
Buttoned-Up Valentine Calendar
Perfect for Little Kids
Little ones can practice their fine motor skills while counting down with this Buttoned-Up Valentine’s Countdown. Make it on your sewing machine or sew it by hand.
valetine-tree-countdown
So Simple and Pretty
The whole family will treasure this Valentine Calendar Tree. This year, everyone can help make the clay heart ornaments.
14 Days of Love
A Kind Act Everyday
Pick a different activity each day from this 14 Acts of Love Bouquet. So many ways to show kindness to others!
Find these and more Valentine’s Crafts to enjoy together while creating fun memories for your family and friends.

ideas for Valentine's Day


I found this blog today with lots of cute ideas for Valentine's Day
here is the link
I made some for gifts myself hope you will enjoy


Coming Celebrations-Imbolc and Valentine's and my facebook Link


Yes my friends it's that wonderful time of year where the winter blues are getting to you, and you just can't wait till springtime.


Imbolc will soon be here (feb2) also known to most of you as Ground hogs day

I am making plans for a wonderful Imbolc, and will post ideas and recipes here as well as you can find them on a Facebook page
Please go check it out
Then after Imbolc time, right around the corner is the beautiful frilly fluffy time of year for Hearts, flowers and Chocolate!
Yea that's right Folks-Valentine's Day Feb 14th


I love winter, don't get me wrong, and I always want a few days of beautiful clean fresh white Snow
then after a nice fluffy snowfall and cleansing time of year to quiet things down, some hot cocoa or warm cider and home baked pies, cobblers and hearty soups and stews and chilli, it's always nice to plan for spring, planting bulbs, crocus, tulips, and watching the pansies spring to life after a few weeks of sleep and garden rest time.
Yes I will welcome spring with open arms and a clean blessed home.